Overview
IoTize Studio configuration software allows you to:
This user manual covers TapNLink, Tapioca and TapNPass product lines.
A dedicated section recaps the options pertinent only for TapNPass.
IoTize project structure
The core concept for IoTize Studio is the notion of project (.iotz extension).
A project is a "master configuration file", which configures IoTize solution components: Tap, Smartphone monitoring application, IOT platform connectivity modes and JVM. Project examples are in the installation directory.Project information is split into:
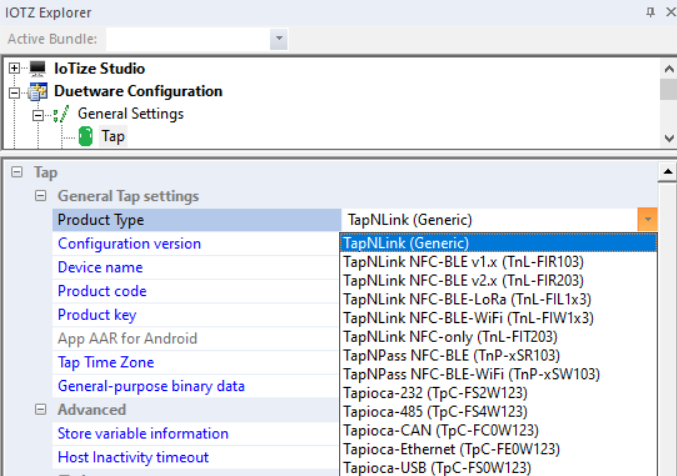
Tap configuration:
- is stored in a dedicated file (.xml or .izsc)
- can be read from a Tap by IoTize Studio (Main menu | Tap | Check Configuration | Check in Tap)
- can be written to a Tap by IoTize Studio (Main menu | Tap | Write Configuration | or button Configure)
- covers all settings used by your Tap to perform:
- monitoring: IDs and address of variables to read or write, security information, pairing
- data logging: bundles to log and check related frequency
IoTize Primer Cloud services configuration
- stored in a dedicated configuration file (.cloud) which is sent to the cloud platform by IoTize Studio (via the Main Menu | TapCloud | Publish HTML)
- Covers settings used by your Tap to perform:
- data logging settings (choice of bundles to log in, frequency)
- visualization settings used by the IOT platform (IoTize Primer Cloud Platform for Primers)
- for TapNLink Primer, these options are automatically managed based on the IoTize end-to-end architecture (which includes a MQTT broker and IoTize Primer cloud services).
- for the standard TapNLink, you need to implement your own architecture. Contact IoTize.
Mobile App settings
- type of application: IoTize 'Tap Manager' HTML Web Pages/Generated App/ CUstom. Refer to UserManuals/MobileDevelopment for more information about these different choices.
- options related to the location and deployment (publishing) of your mobile HTML pages or the generated 'Mobile App'.
IoTize Studio settings
- options related to the connection of your Tap with IoTize Studio.
- log options (verbose level, log file).
IoTize Studio GUI
IoTize Studio GUI windows:
Can be undocked, moved, resized, overlapped and closed.
Their visibility is controlled from View | Toolbars and Docking Windows. The only exception is the Web Viewer which occupies any free space and cannot be closed.
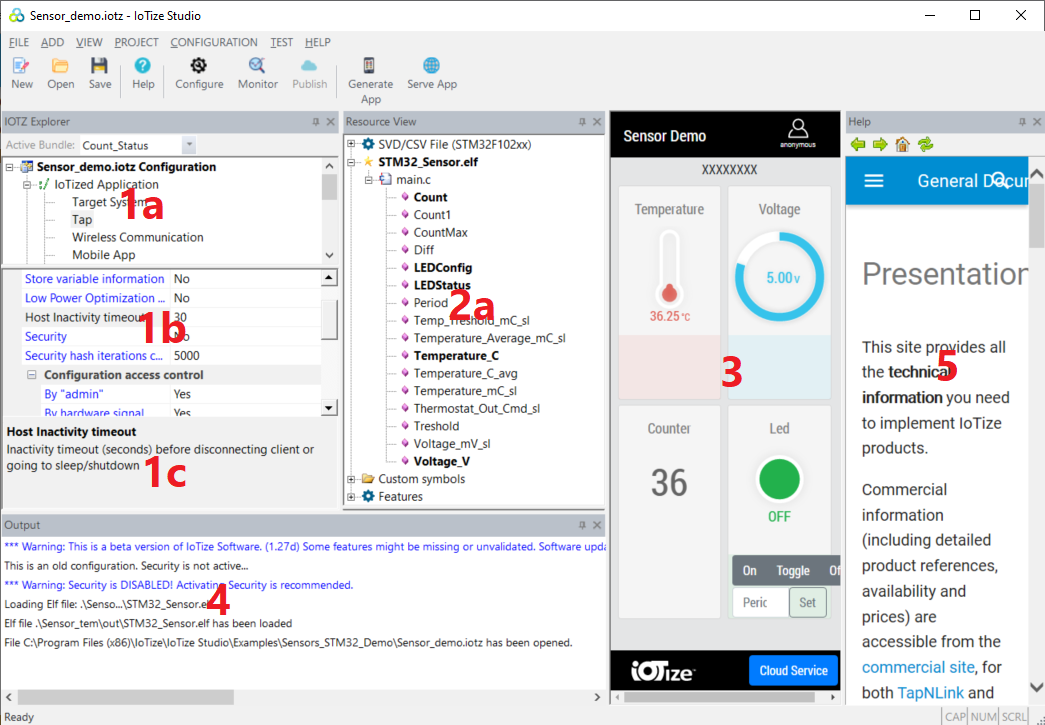
IoTize Studio windows:
- 1a. Configuration pane
- IoTized Application contains: Target System, Tap, Incoming communication (Wireless), Mobile App, and IoT Platform (MQTT).
- Studio contains general information about the project name and the tap connection.
- Bundles contains information about the resources to be accessed on the target.
- Profiles contains profiles (pre-defined and custom).
- 1b. Properties pane: properties of the element selected above.
- 1c. Contextual help of the property selected above.
- 2a. Resources View pane:
- Symbols refers to addresses in your target application, and can be:
- retrieved from your ELF file (defined in your C or Assembler source file).
- retrieved from the SVD file (System View Description) provided by MCU vendor.
- complies with CMSIS/ARM specification.
- can be obtained from ARM website after (free) registration.
- allows to select MCU registers as variables.
- defined directly by the user in IoTize Studio.
- from an XML file (.svd compliant) or a CSV file for ModBus target protocol.
- Features provide complementary ways to access Target resources:
- like symbols, they can be attached to bundles and profiles.
- the built-in HTML page generator is NOT relevant for features.
- example : direct SWD can be used to re-program your target application or remote debugging, for example from RIDE (the Raisonance development environment).
- Symbols refers to addresses in your target application, and can be:
- 2b. Properties pane: properties of the resource (symbol or feature) selected above.
- 2c. Contextual help of the object selected above.
- 3. Web Viewer (used by the built-in HTML page generator).
- displays the current HTML page when a profile is selected. This display only applies if:
- you set the option **App Type** = **IoTize Type Manager app** in **IoTized Application** | **Mobile App**.
- you set the option **Automatic Web site generation** = **Yes** in **Studio**.
- refer to [Mobile Development](../../UserManuals/MobileDevelopment) for a detailed description of the built-in HTML page generator.
- displays the current HTML page when a profile is selected. This display only applies if:
- 4. Output View: displays messages such as configuration errors, inconsistent element detection, tap successfully configured (you can adjust the verbose level).
- 5. Online help.
You can access the JVM Editor from the View Menu in the upper bar menu.Furthermore you can adjust the default display of the IoTize Studio here as well.