Starting with an uninitialized module
Note: this page describes the fatest way to start with a TapNLink module (or a gateway). It does not show how to create an App with the IoTize App Tools.
IoTize offers two categories of products, and the journey will differ slightly depending on this type of product:
-
Either you will integrate a TapNLink module into your electronics (connected it to a microcontroller present in your electronics, or connected to a simple sensor/actuator).
-
Or you associate a Tapioca or TapNPass gateway with an existing system that has an open wired connection: Modbus (RTU or TCP), CAN, USB, etc.
Depending on your context, we propose to prepare first your hardware and the symbol table you will use:
-
here for TapNLink (module),
-
or here for Tapioca and TapNPass (gateway),
Erasing the configuration (Factory Reset)
(in case your module is not blank and you want to clear its current configuration)
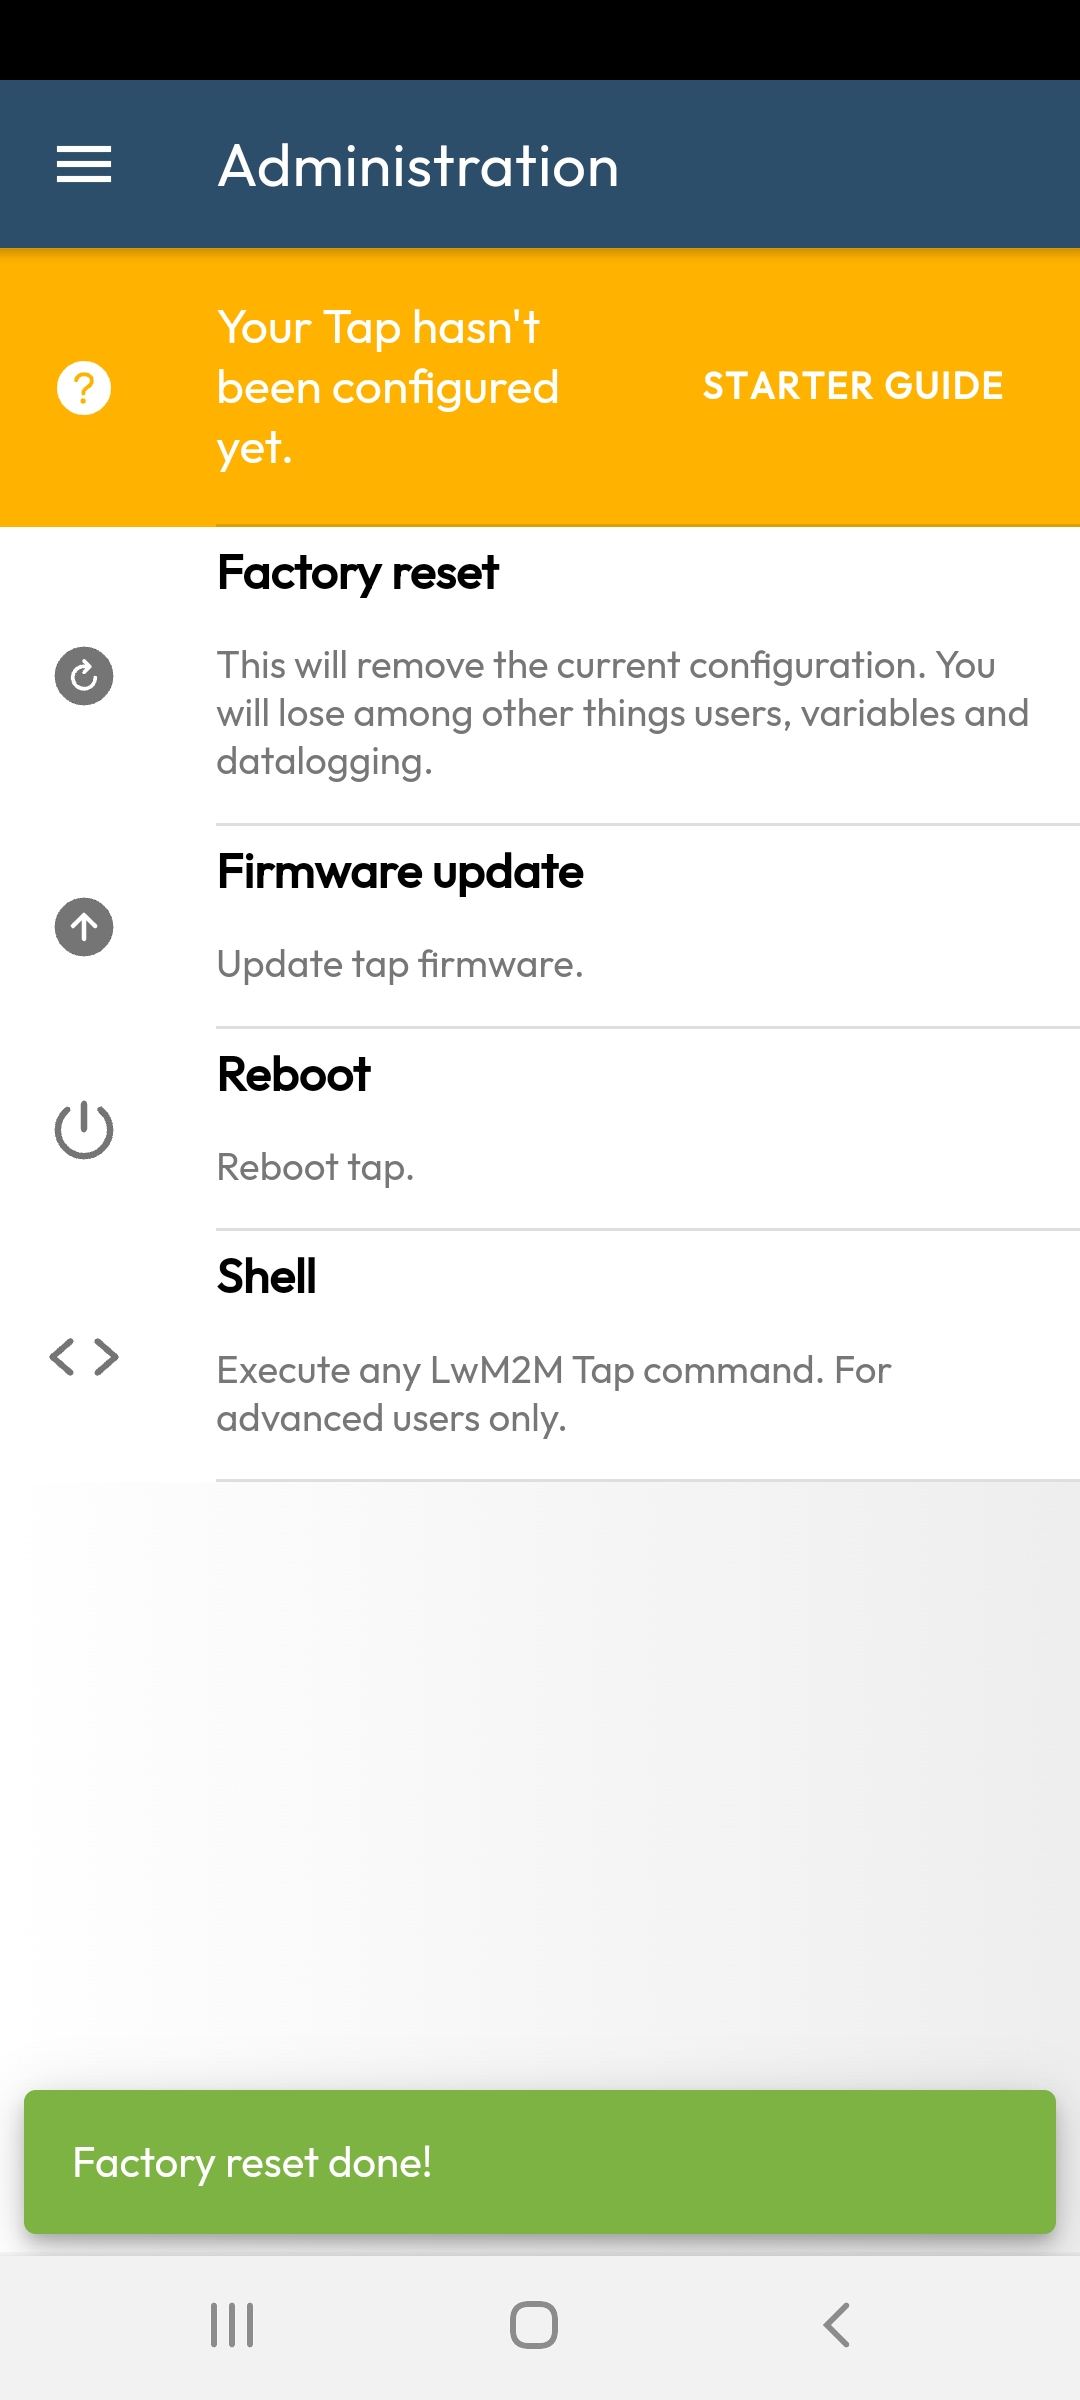
When the connection is established between Tap Manager and your module, return to the Home page and log in as an administrator (by default login= admin and password= admin).
Then open the Administration page from the 'burger' menu (i.e. by clicking on the 3 horizontal lines in the upper left corner). You can then run the 'Factory Reset' command.
The new (empty) configuration will take 'Tap Manager' as the default associated application when you use the NFC to connect. But for this change to take effect, you will need:
- Or quit Tap Manager and turn off the power to your kit.
- Or return to the home page and perform a 'reboot';
You can also click on 'Starter Guide' to go further...
Note: If your Tap's firmware is not up to date, you will be offered a firmware update. We strongly recommend that you follow this procedure in order to access the full functionality of the tools (especially if you want to develop Java code).
First time setup with Tap Manager
Once the configuration has been erased, the symbol file ready, you can let yourself be guided to create a first configuration. Follow the different screens that allow you to define the main characteristics of the configuration:
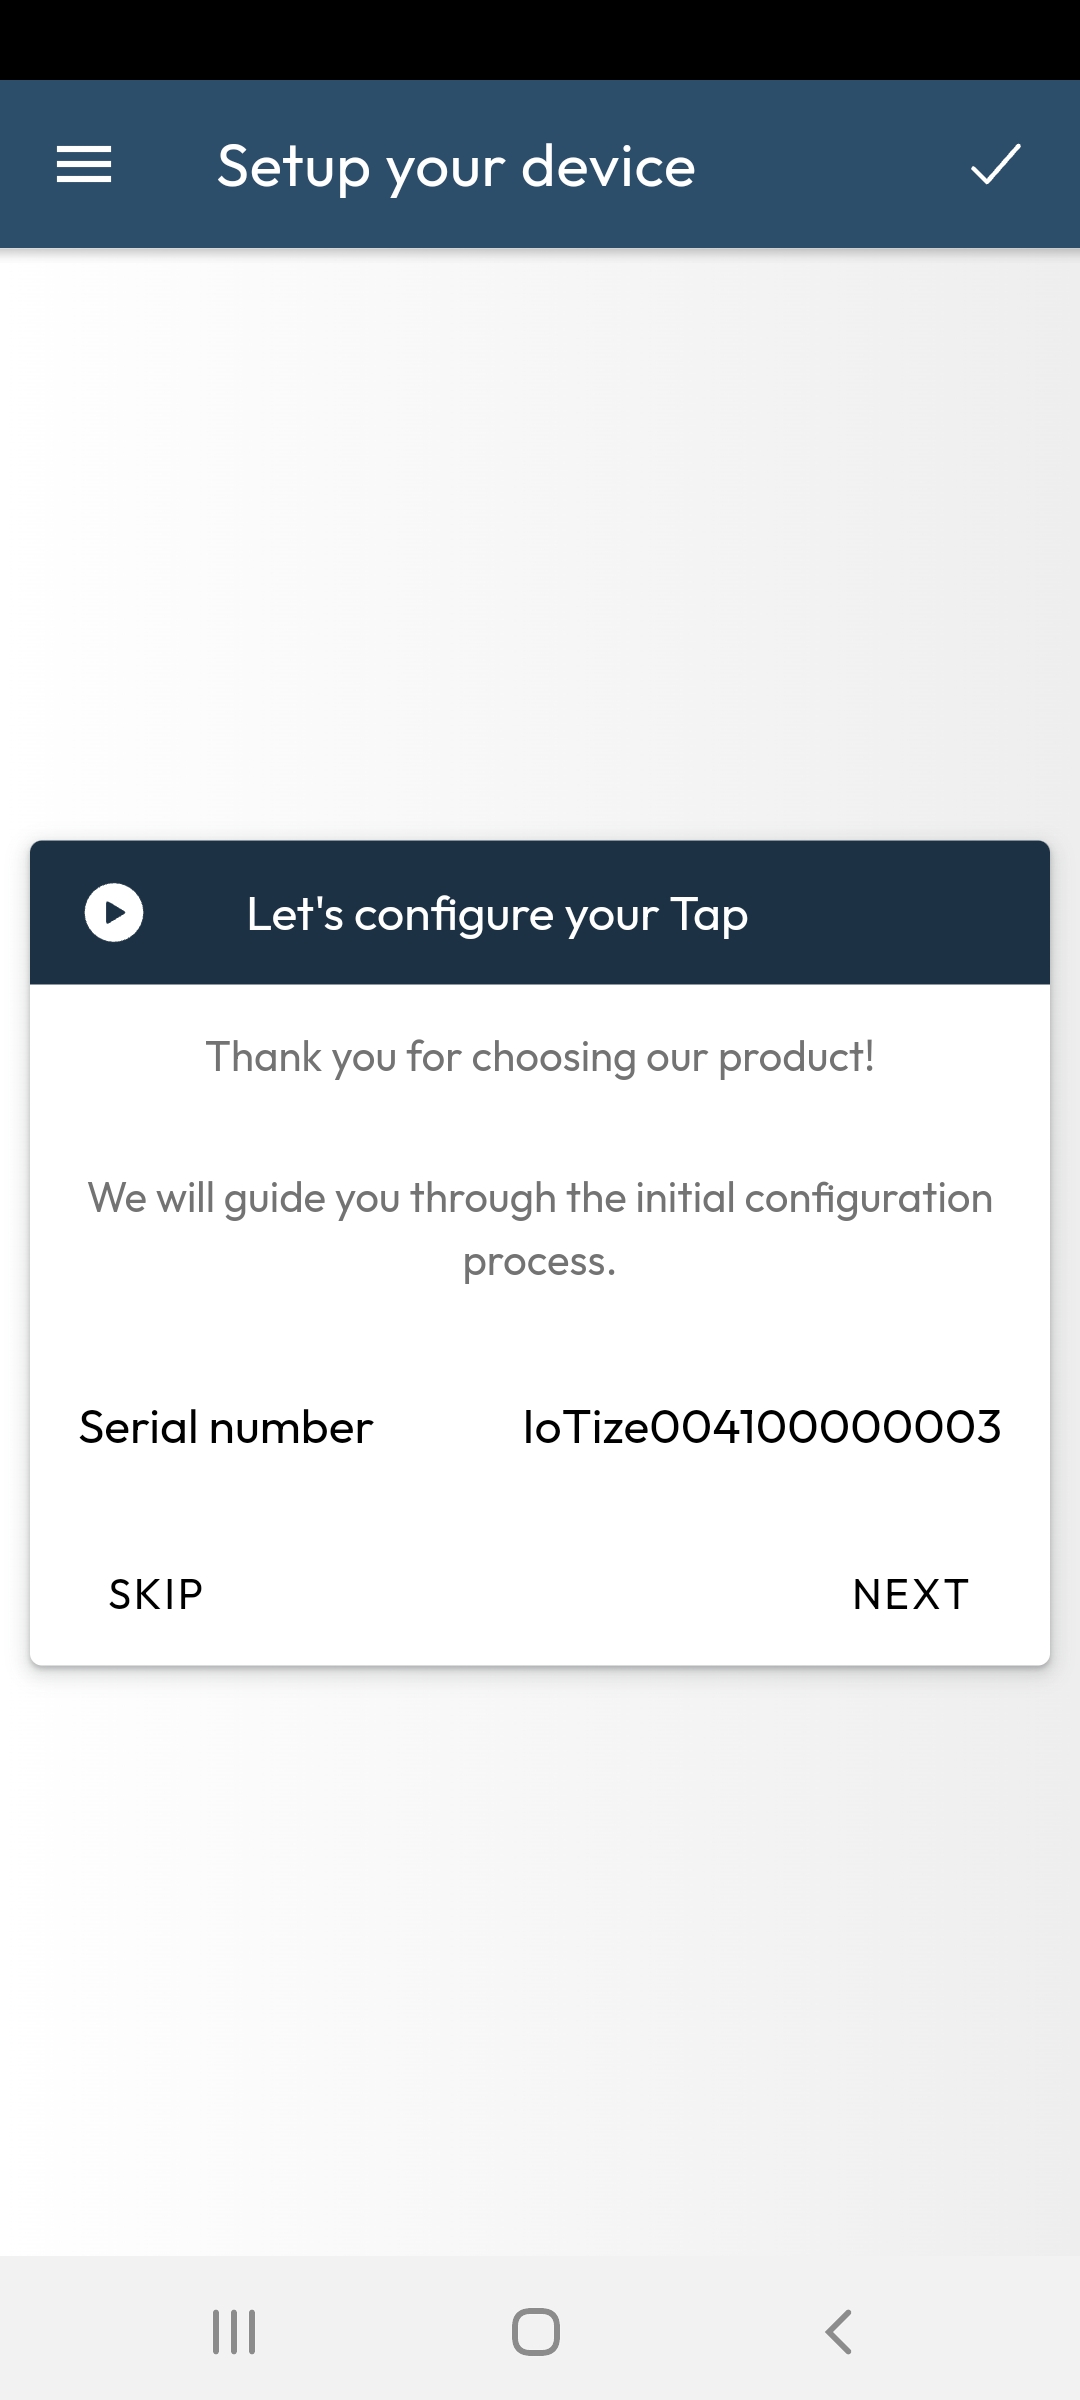
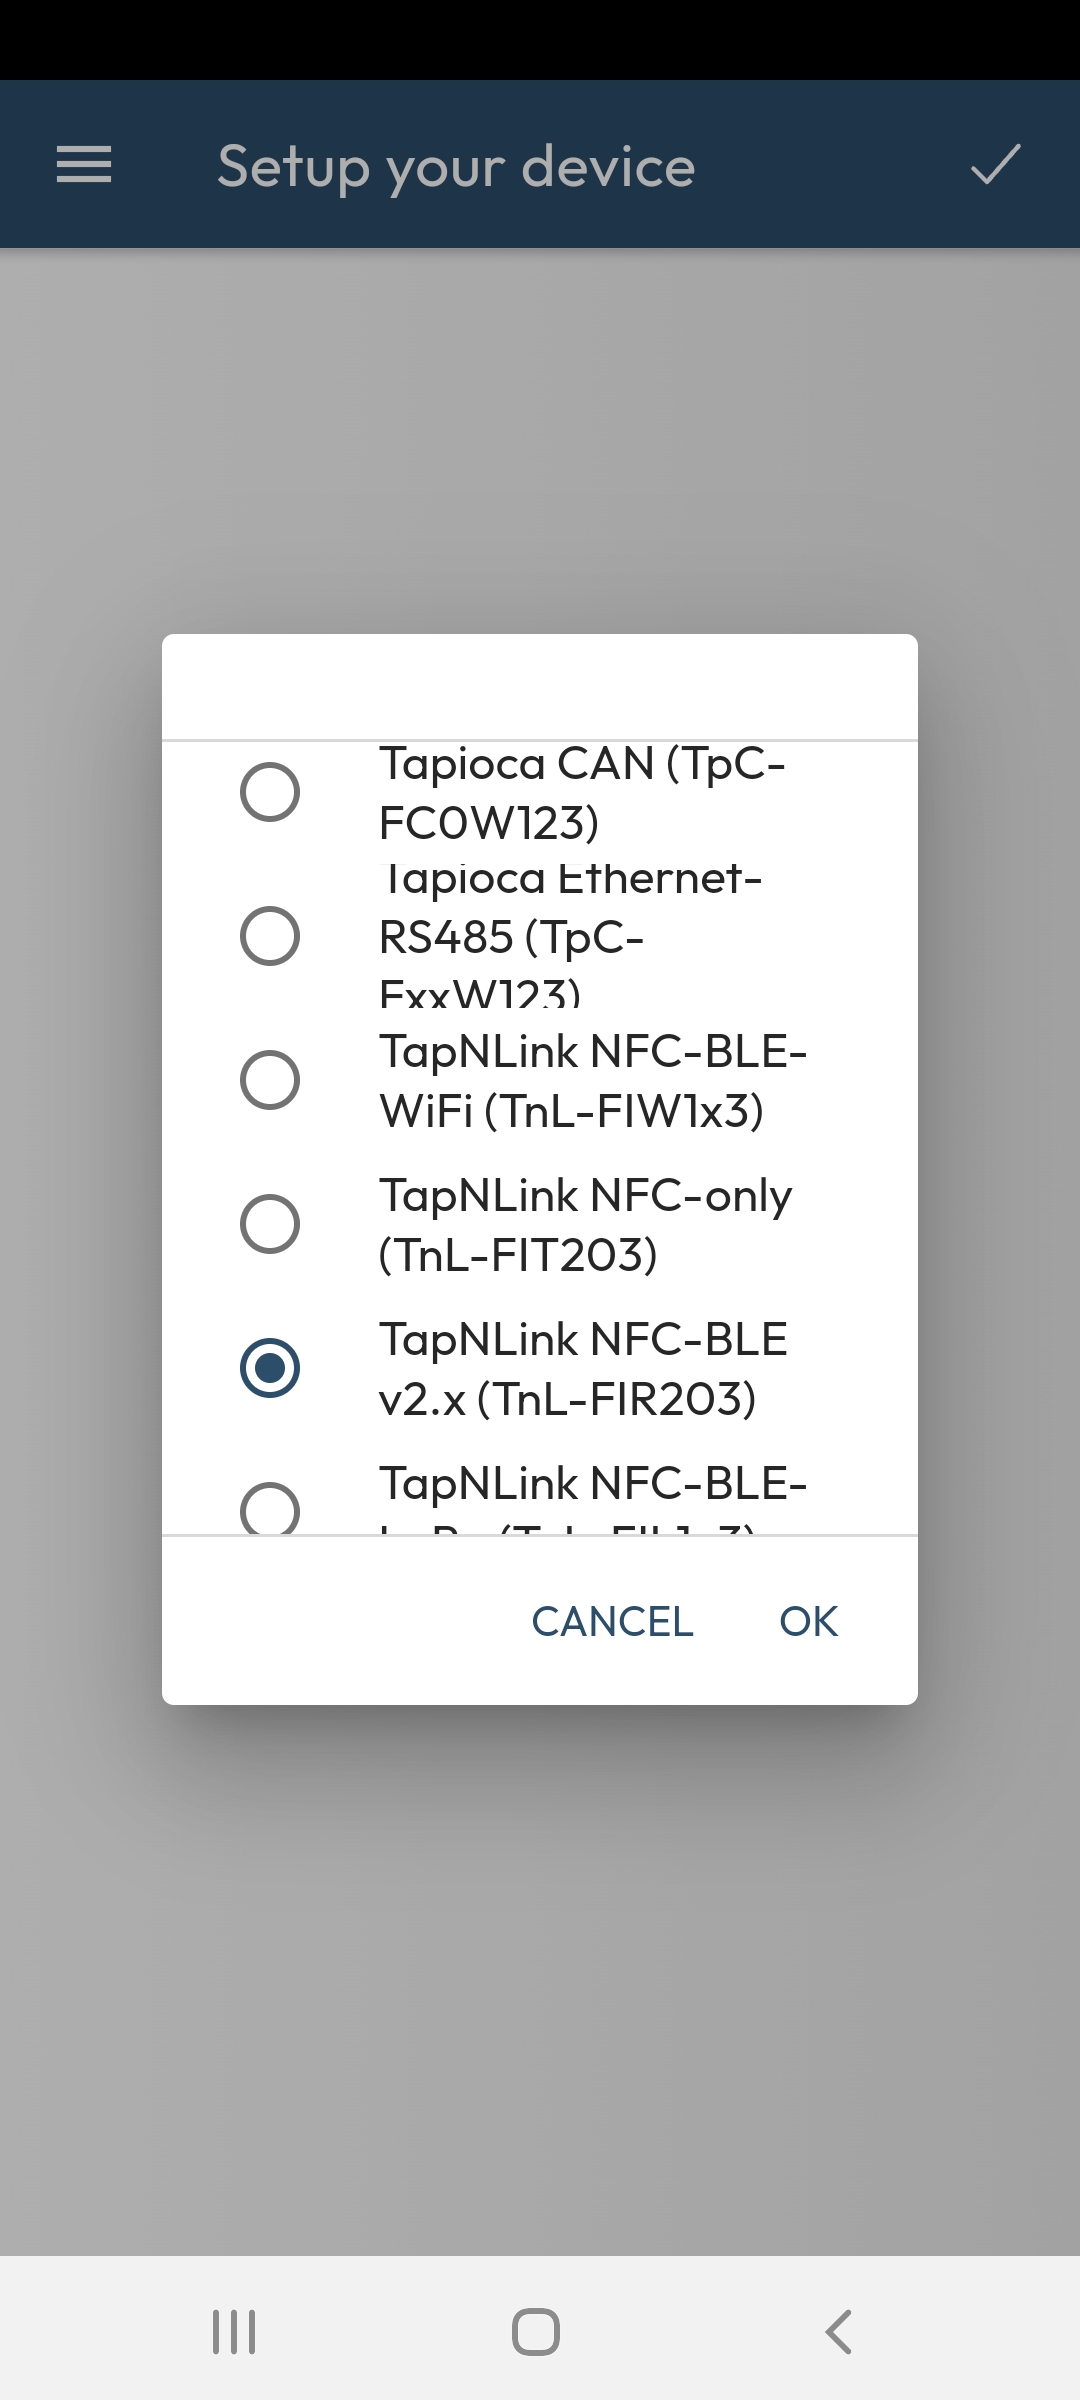
- First choose the type of module/gateway you have, then tap Next,
- Register on the IoTize Cloud (or skip this page). Creating an account is not mandatory for using Tap Manager, but you will need one to generate your own mobile Application (or to use the IoTize broker).
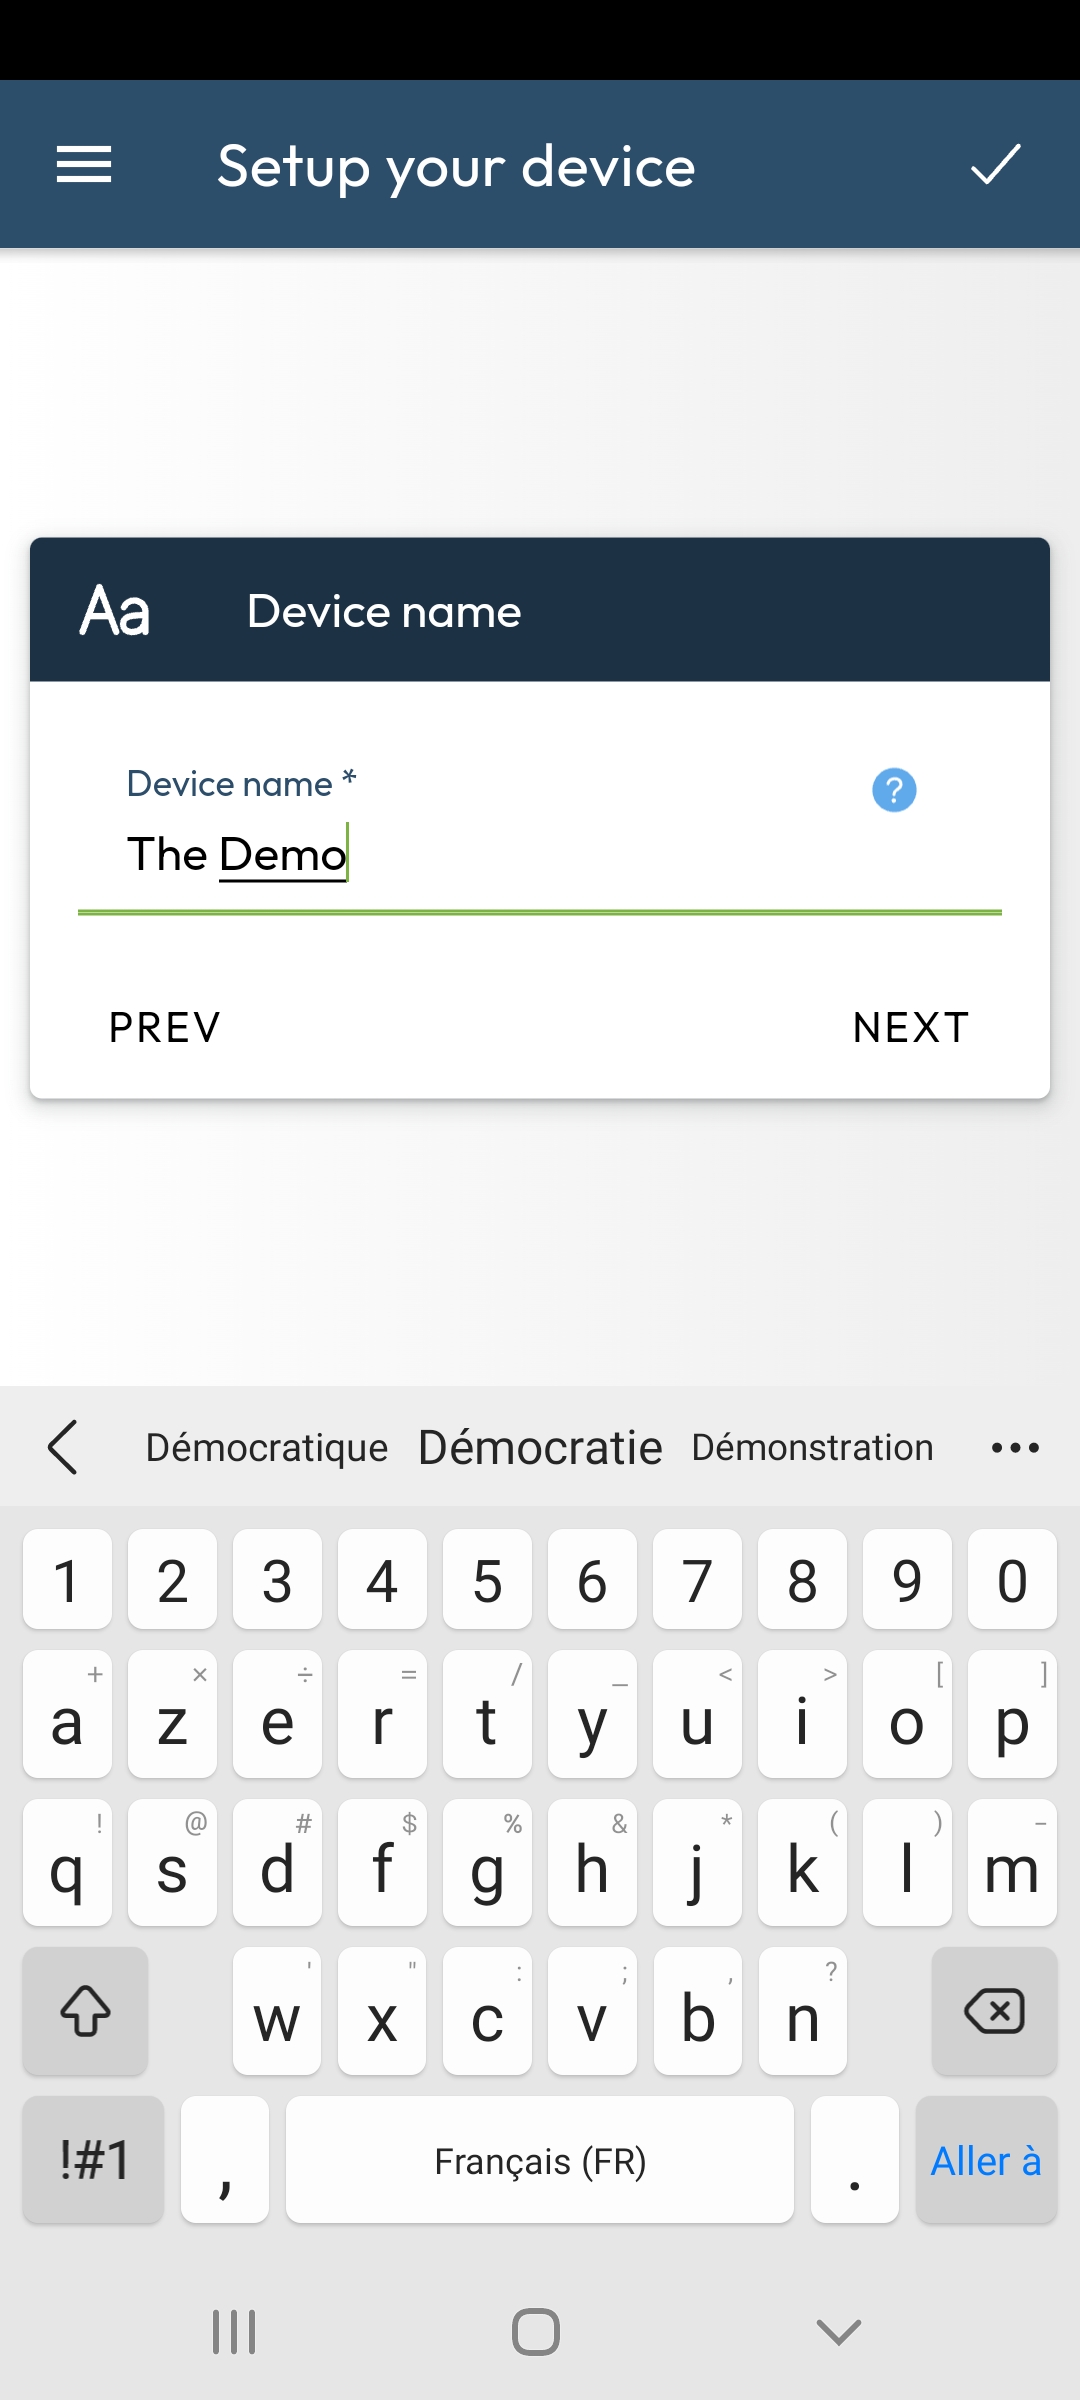
- Enter an identifier for the application (The Demo in this example), then click on Next,
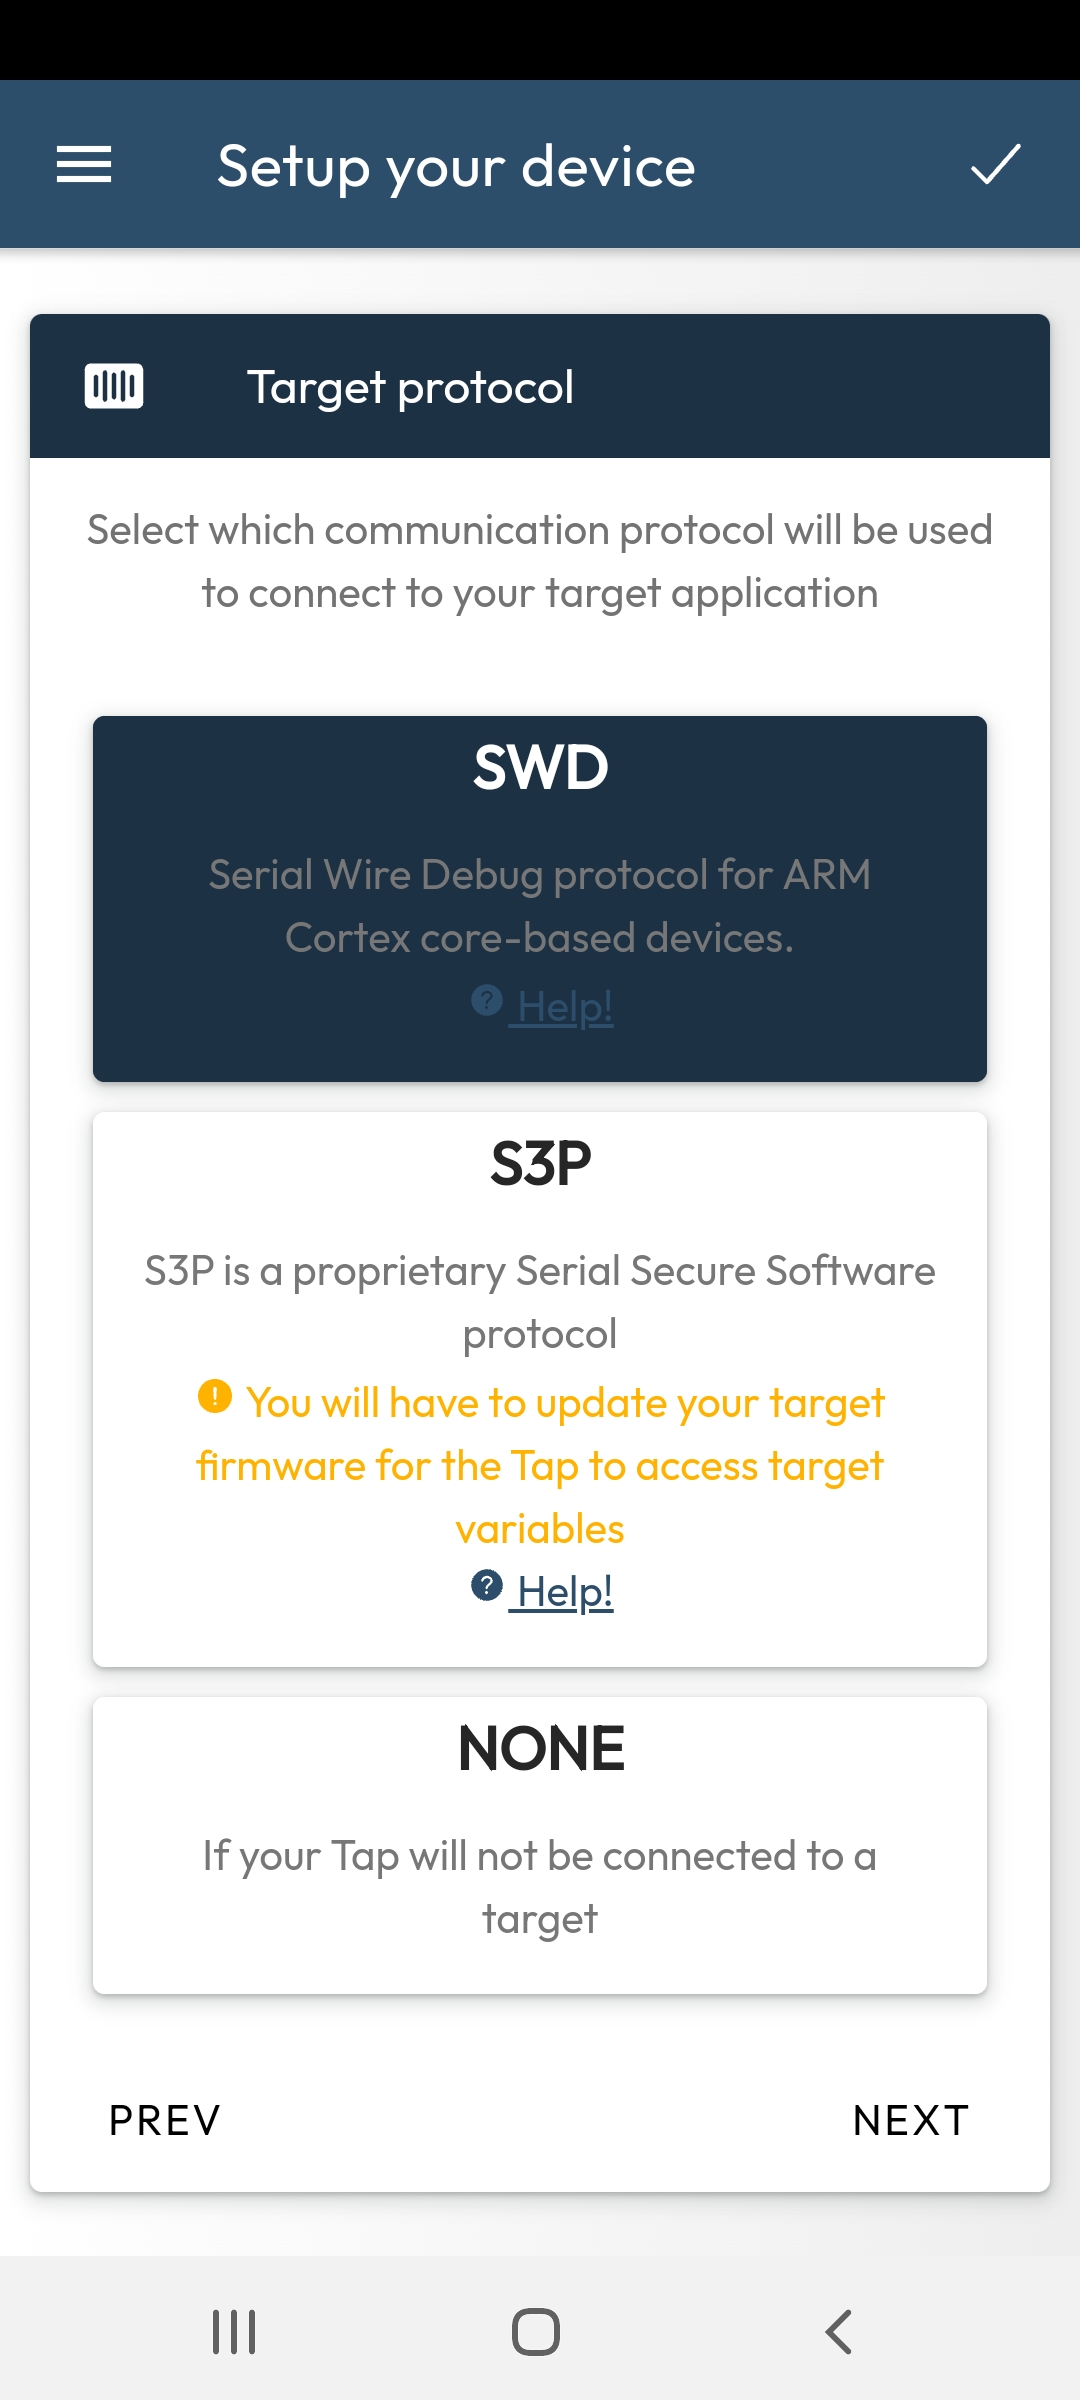
- Choose the SWD protocol (if you are configuring a TapNLink module ) or 'Modbus' if you are using a Tapioca/TapNPass device, then Next
- We are then offered to also retrieve variables from an SVD file (for TapNLInk), but let's leave that for now and press Skip
Then a series of screens that will allow you to define the variables to be monitored:
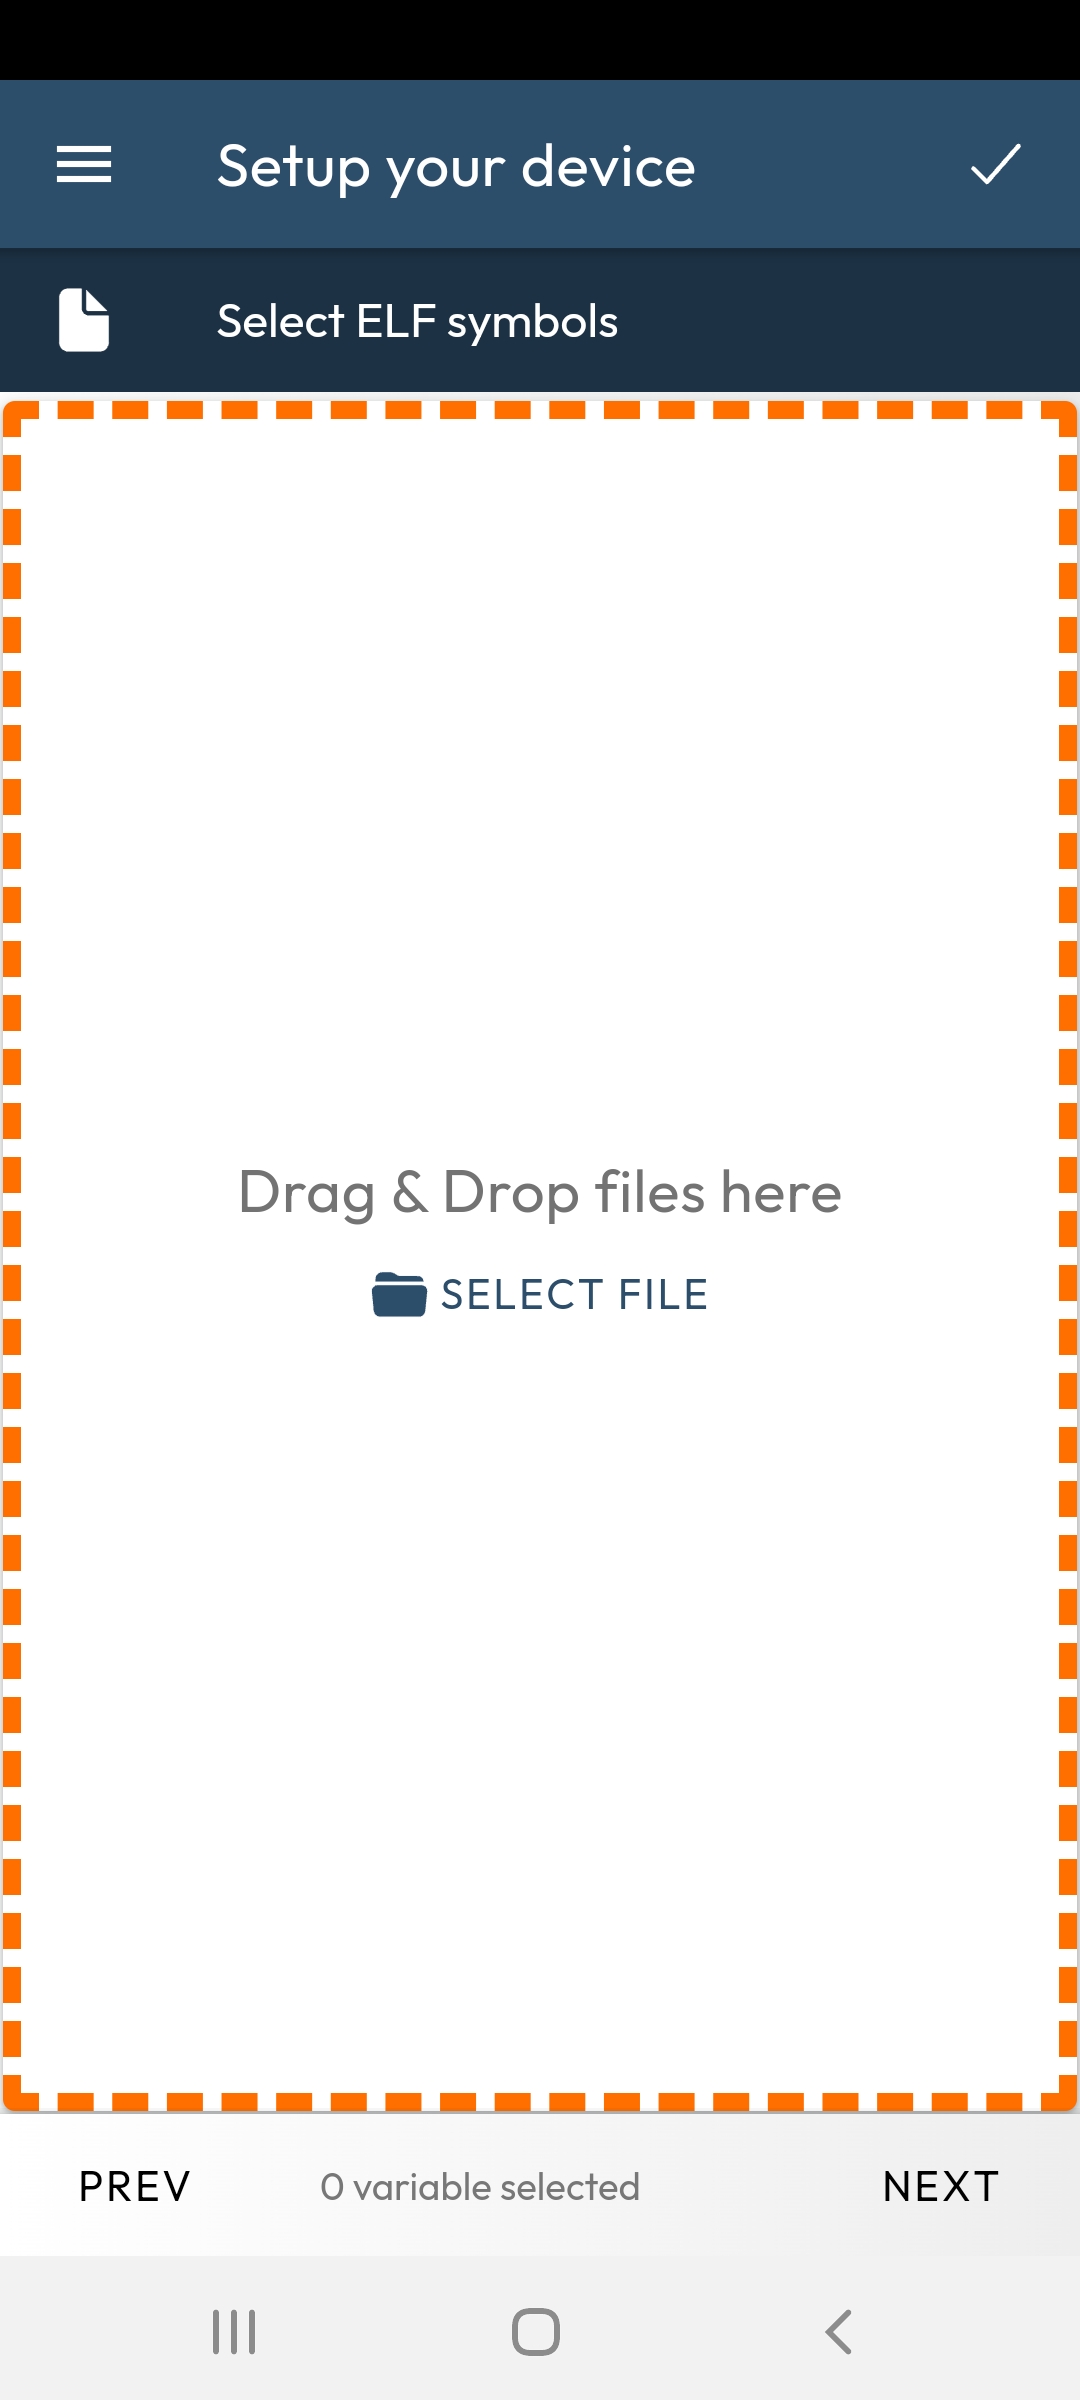
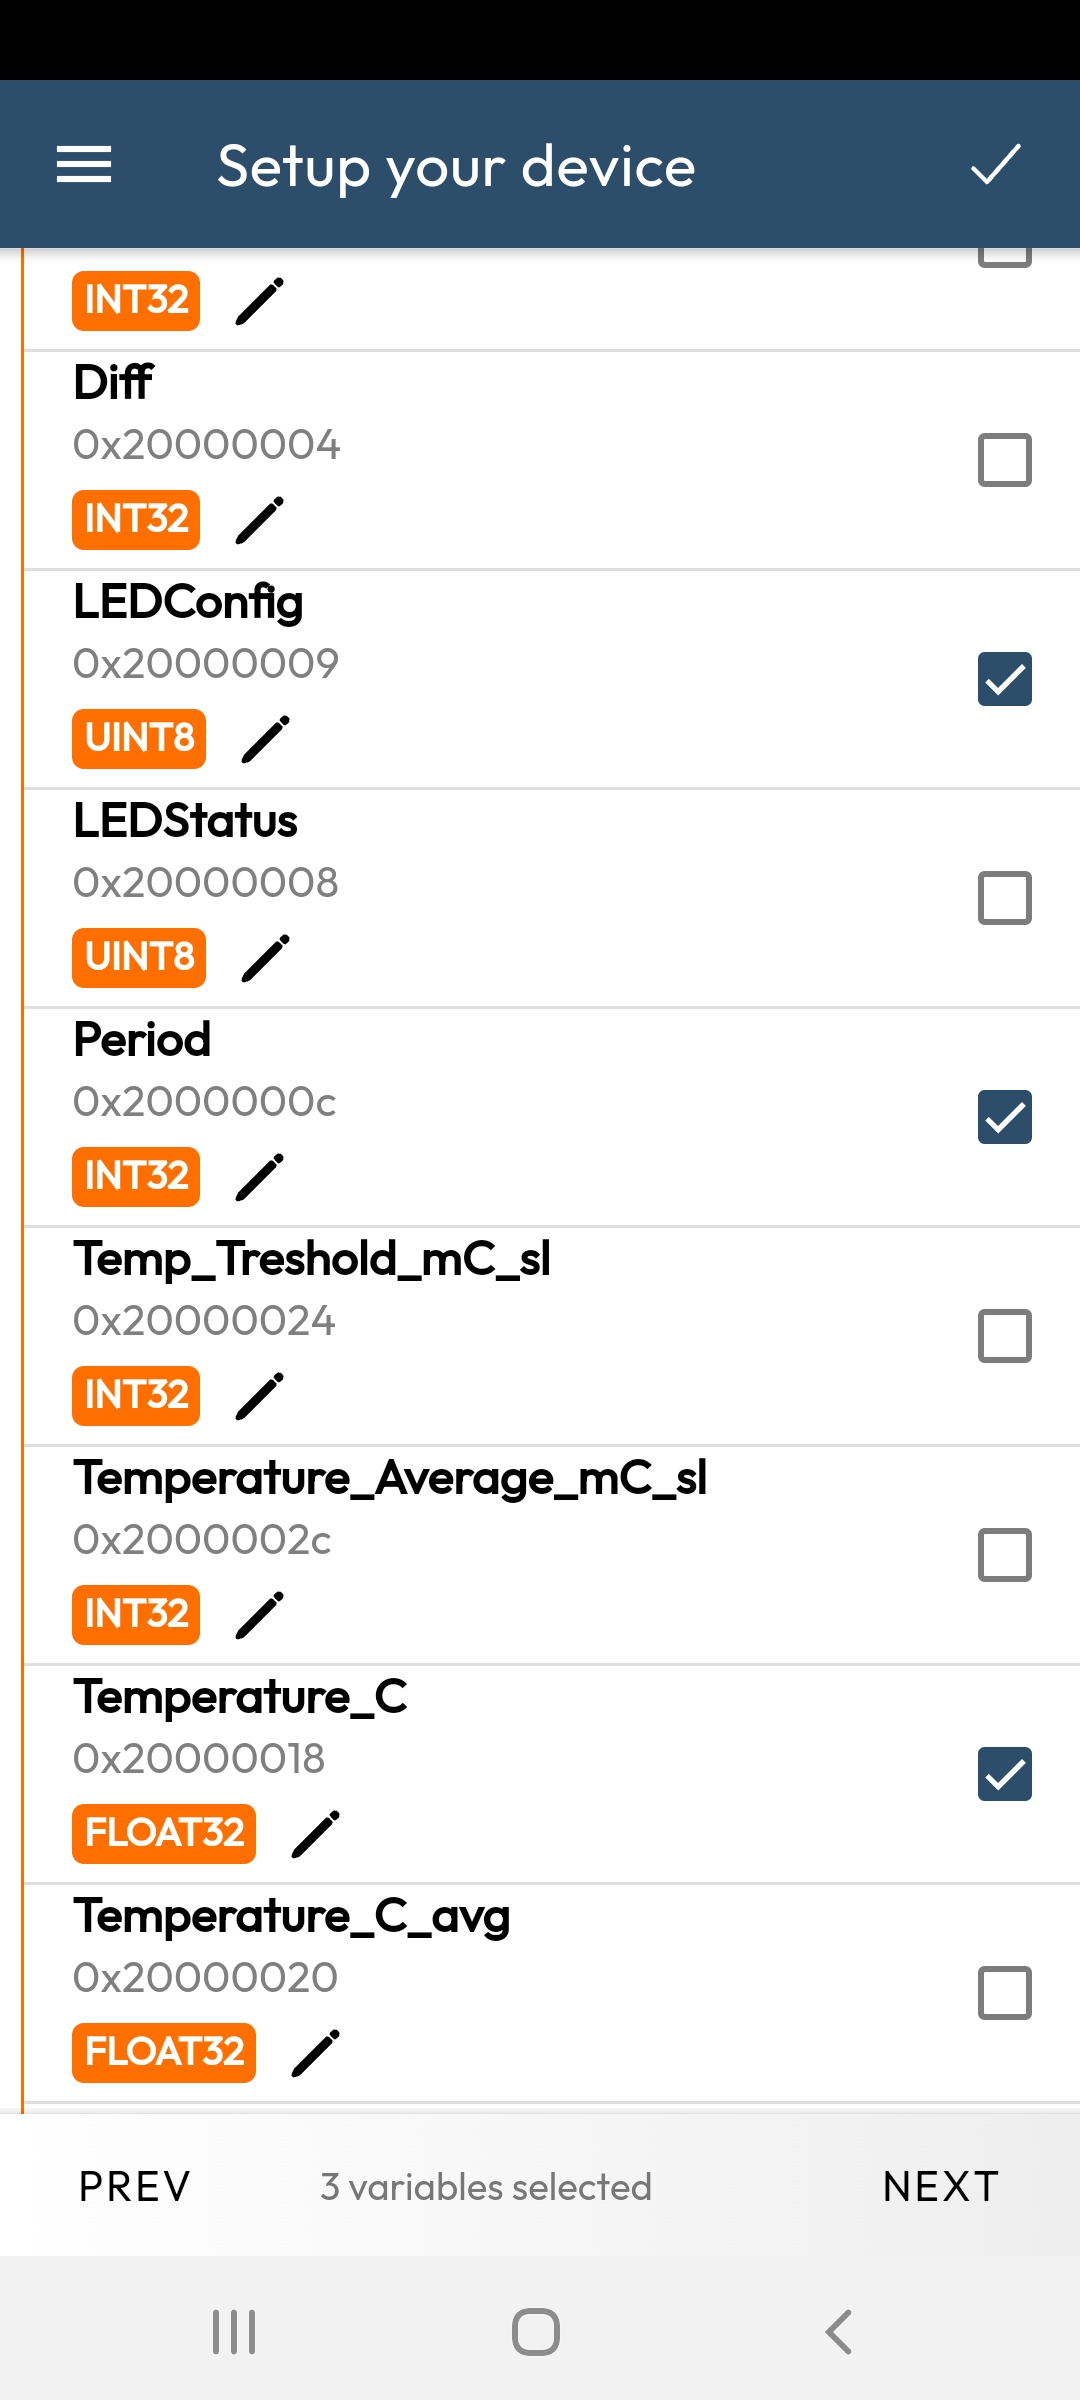

- You can then select the "STM32_Sensor.elf" file that you had retrieved,
- Then open the file 'main.c' and select some of these variables. Let's take for the moment ' LEDConfig ', ' Period ', ' Temperature_C ' and, at the very bottom by scrolling, ' Voltage_V '. Then Next again.
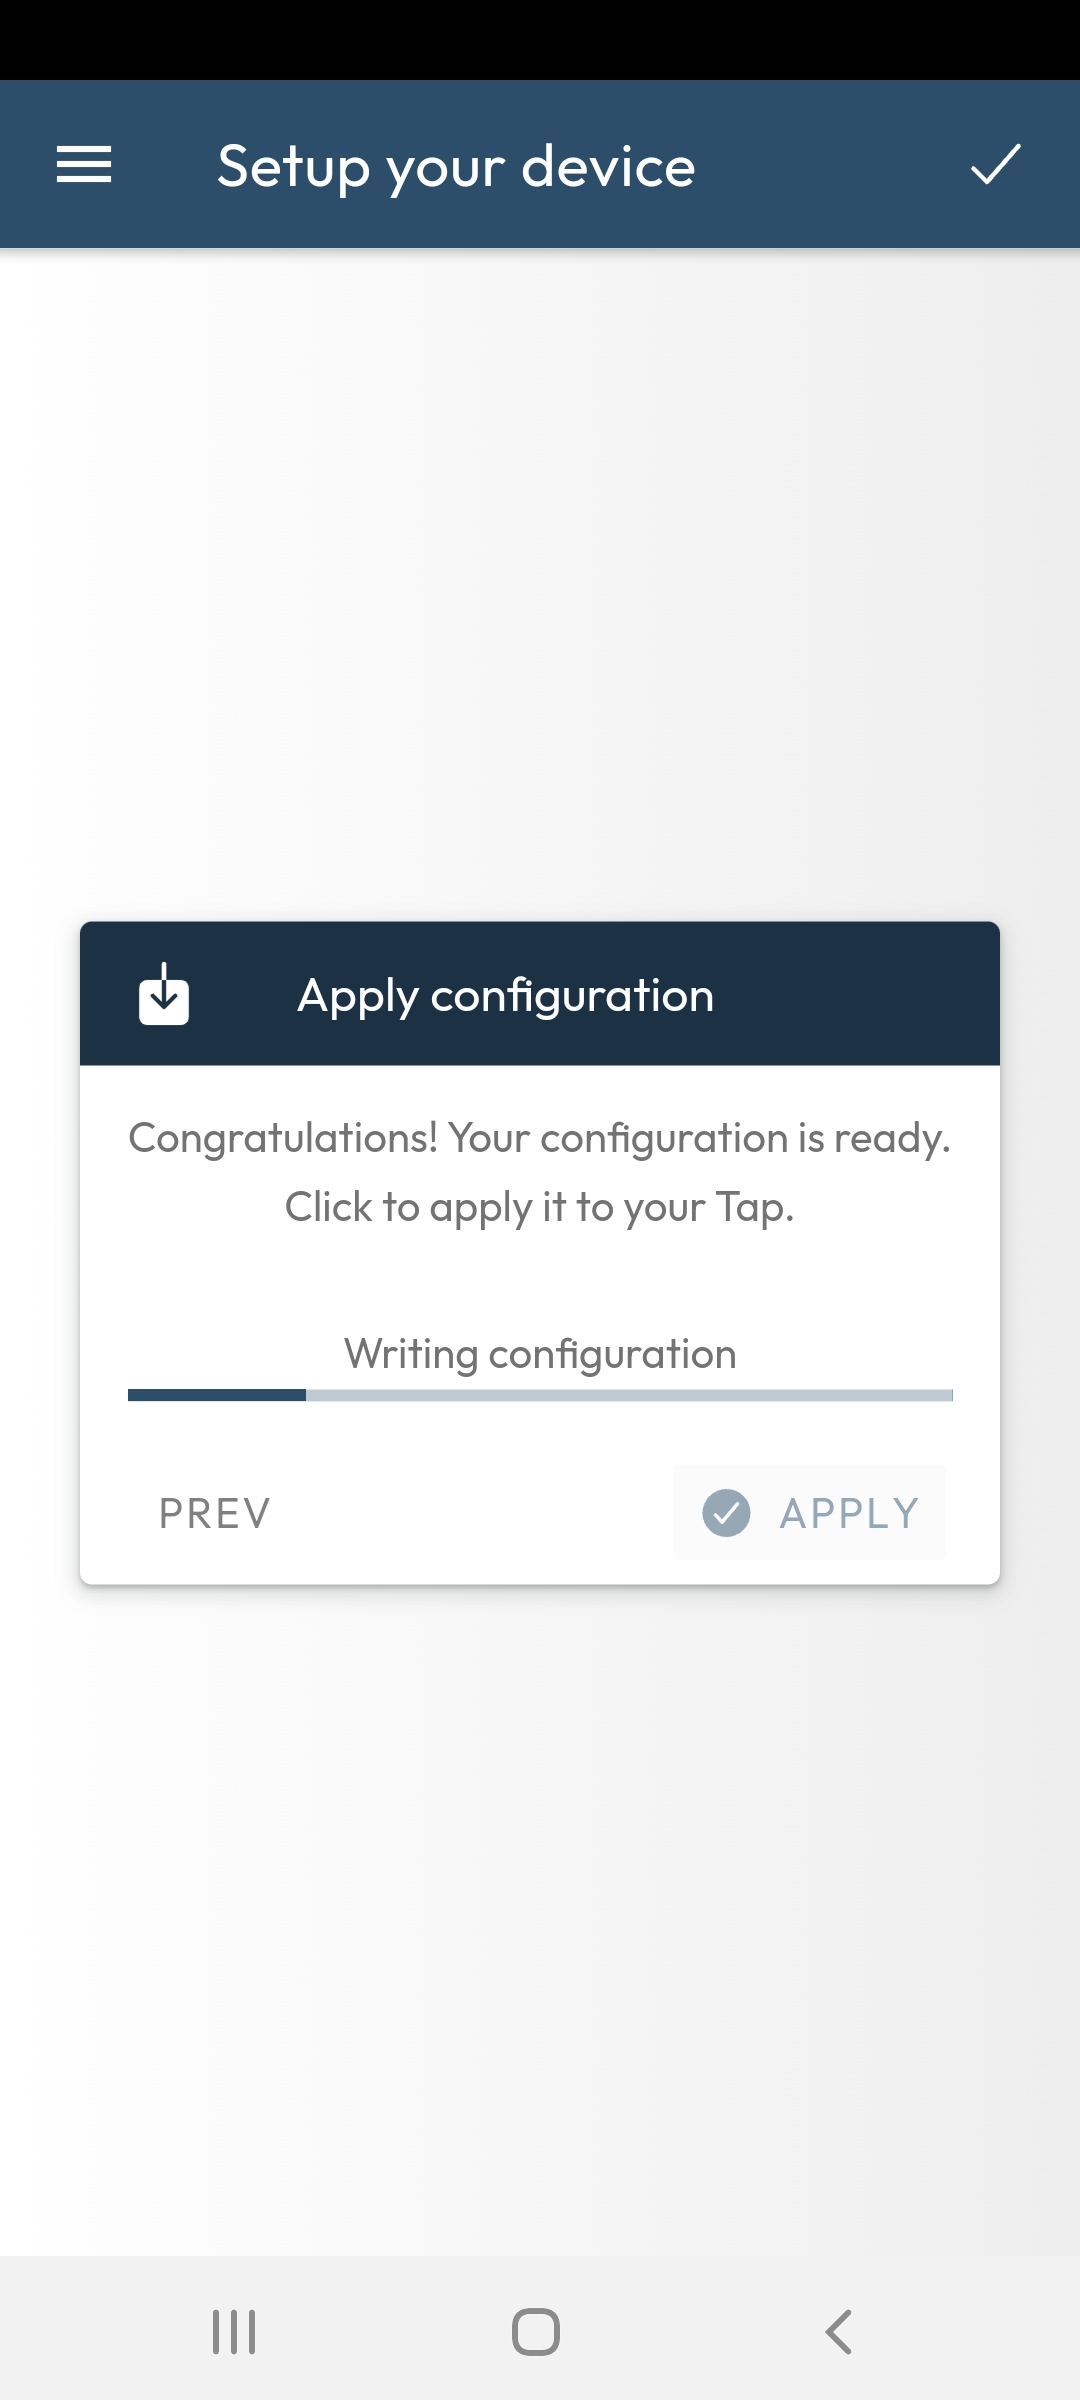
The main configuration is finished, and we can click on Apply (to apply, login as admin will be also required). Then on restart so that the new configuration is taken into account.
After restarting, we are redirected to a basic monitoring screen which shows us the numerical values of the four selected variables:
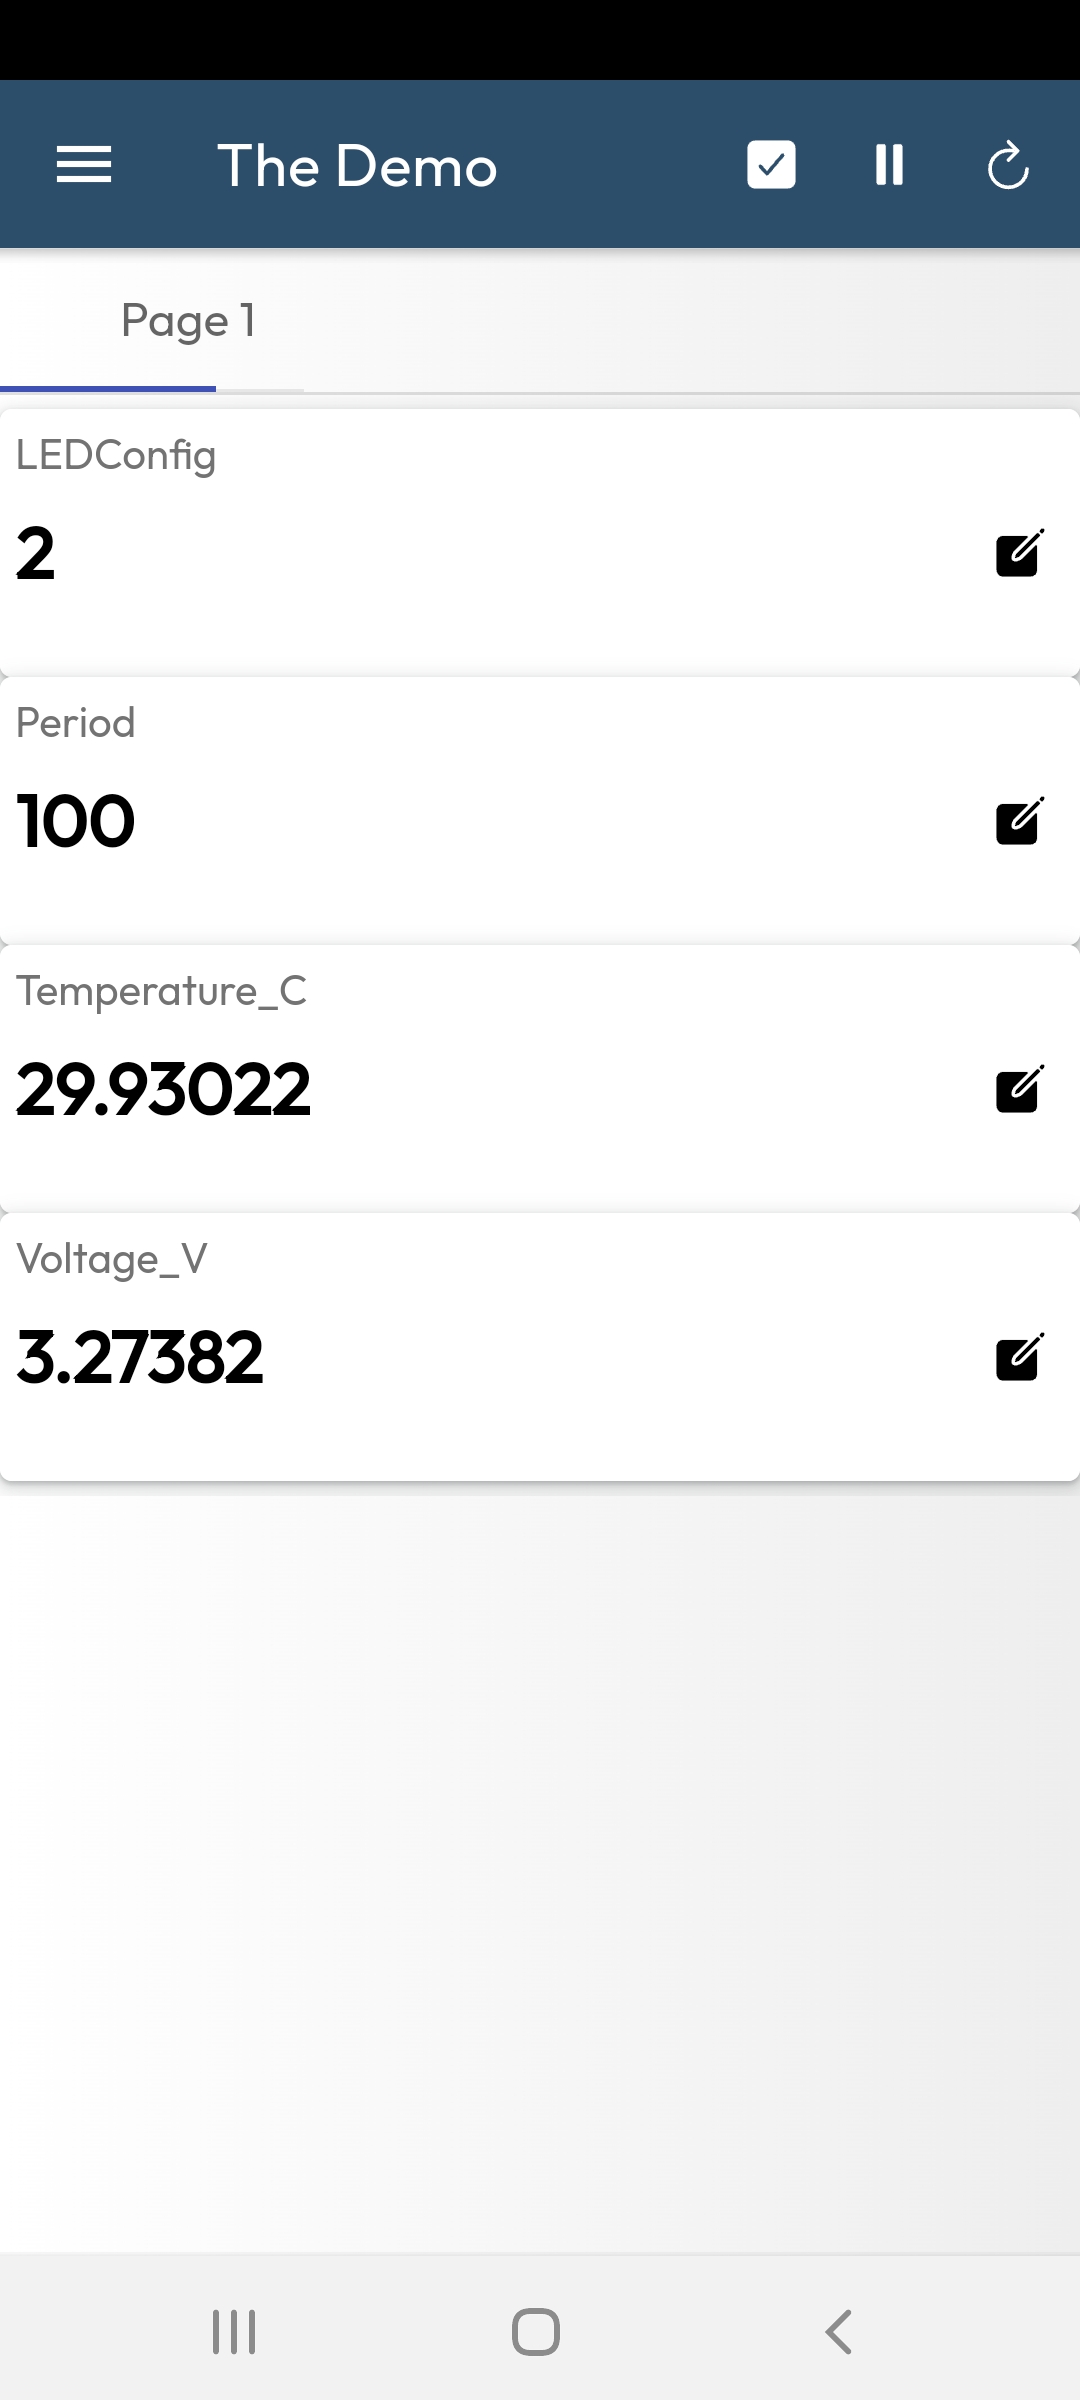
The next steps will consist of organizing in two pages, then defining the most appropriate graphical representation for each of these variables,
Customizing the Human Machine Interface
We are now going to configure the display mode of these variables. For all these operations, you must be 'logged in' as an administrator (admin/admin). From the 'burger' menu, open the Monitoring configuration page.
On the first line is displayed the 'Target Protocol': SWD in our case.
On the second line, 'Page 1' is the title of the only current page. Click on the 'gear' button on the next line, and rename this page to 'Sensors'. At the end of each of these operations, you should press the Save button to save your modifications.

To create a second page, press the '+' button at the bottom center of the page. We can then:
-
open a file again to import variables (first sub-button),
-
create a page (second sub-button)
-
manually create a new variable to specify.
Let's first create a second page that we name LED.
You can then move (drag and drop) some variables from the first page to the second by using the button in the lower right corner of each of the variables (cross with double arrows). So let's move the LEDConfig and Period variables from the Sensors page to the LED page.
We have thus organized our two pages, each of them contains two variables. We are now going to edit the appearance of each of the variables by clicking on the edit variable icon (to the left of the destruction icon).
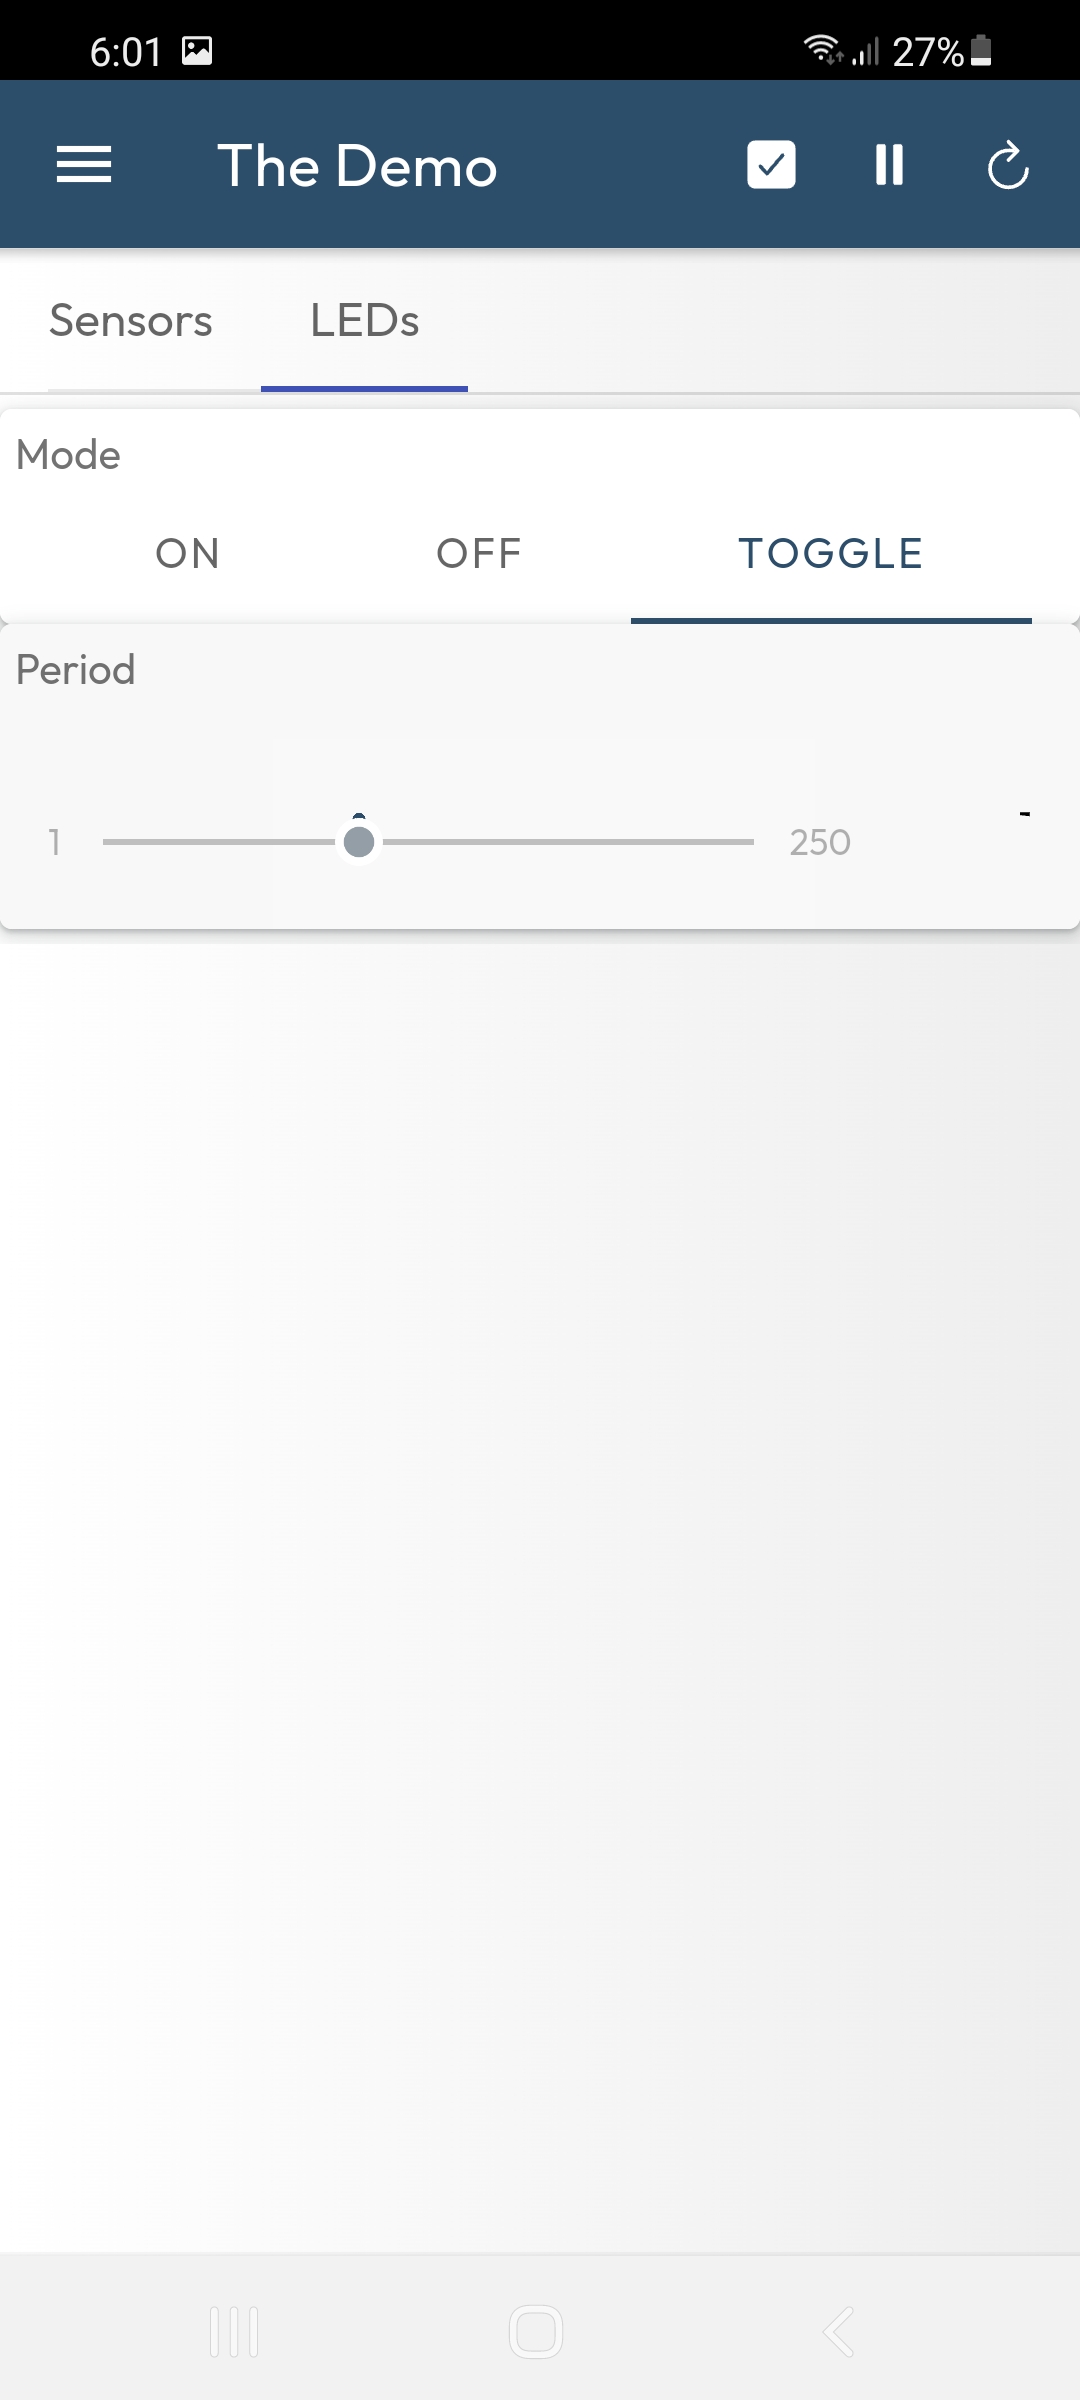
For the LEDConfig variable (LED page), we replace the default type Number with a series of Buttons. We then need to create (New) three buttons to which we associate as labels and values:
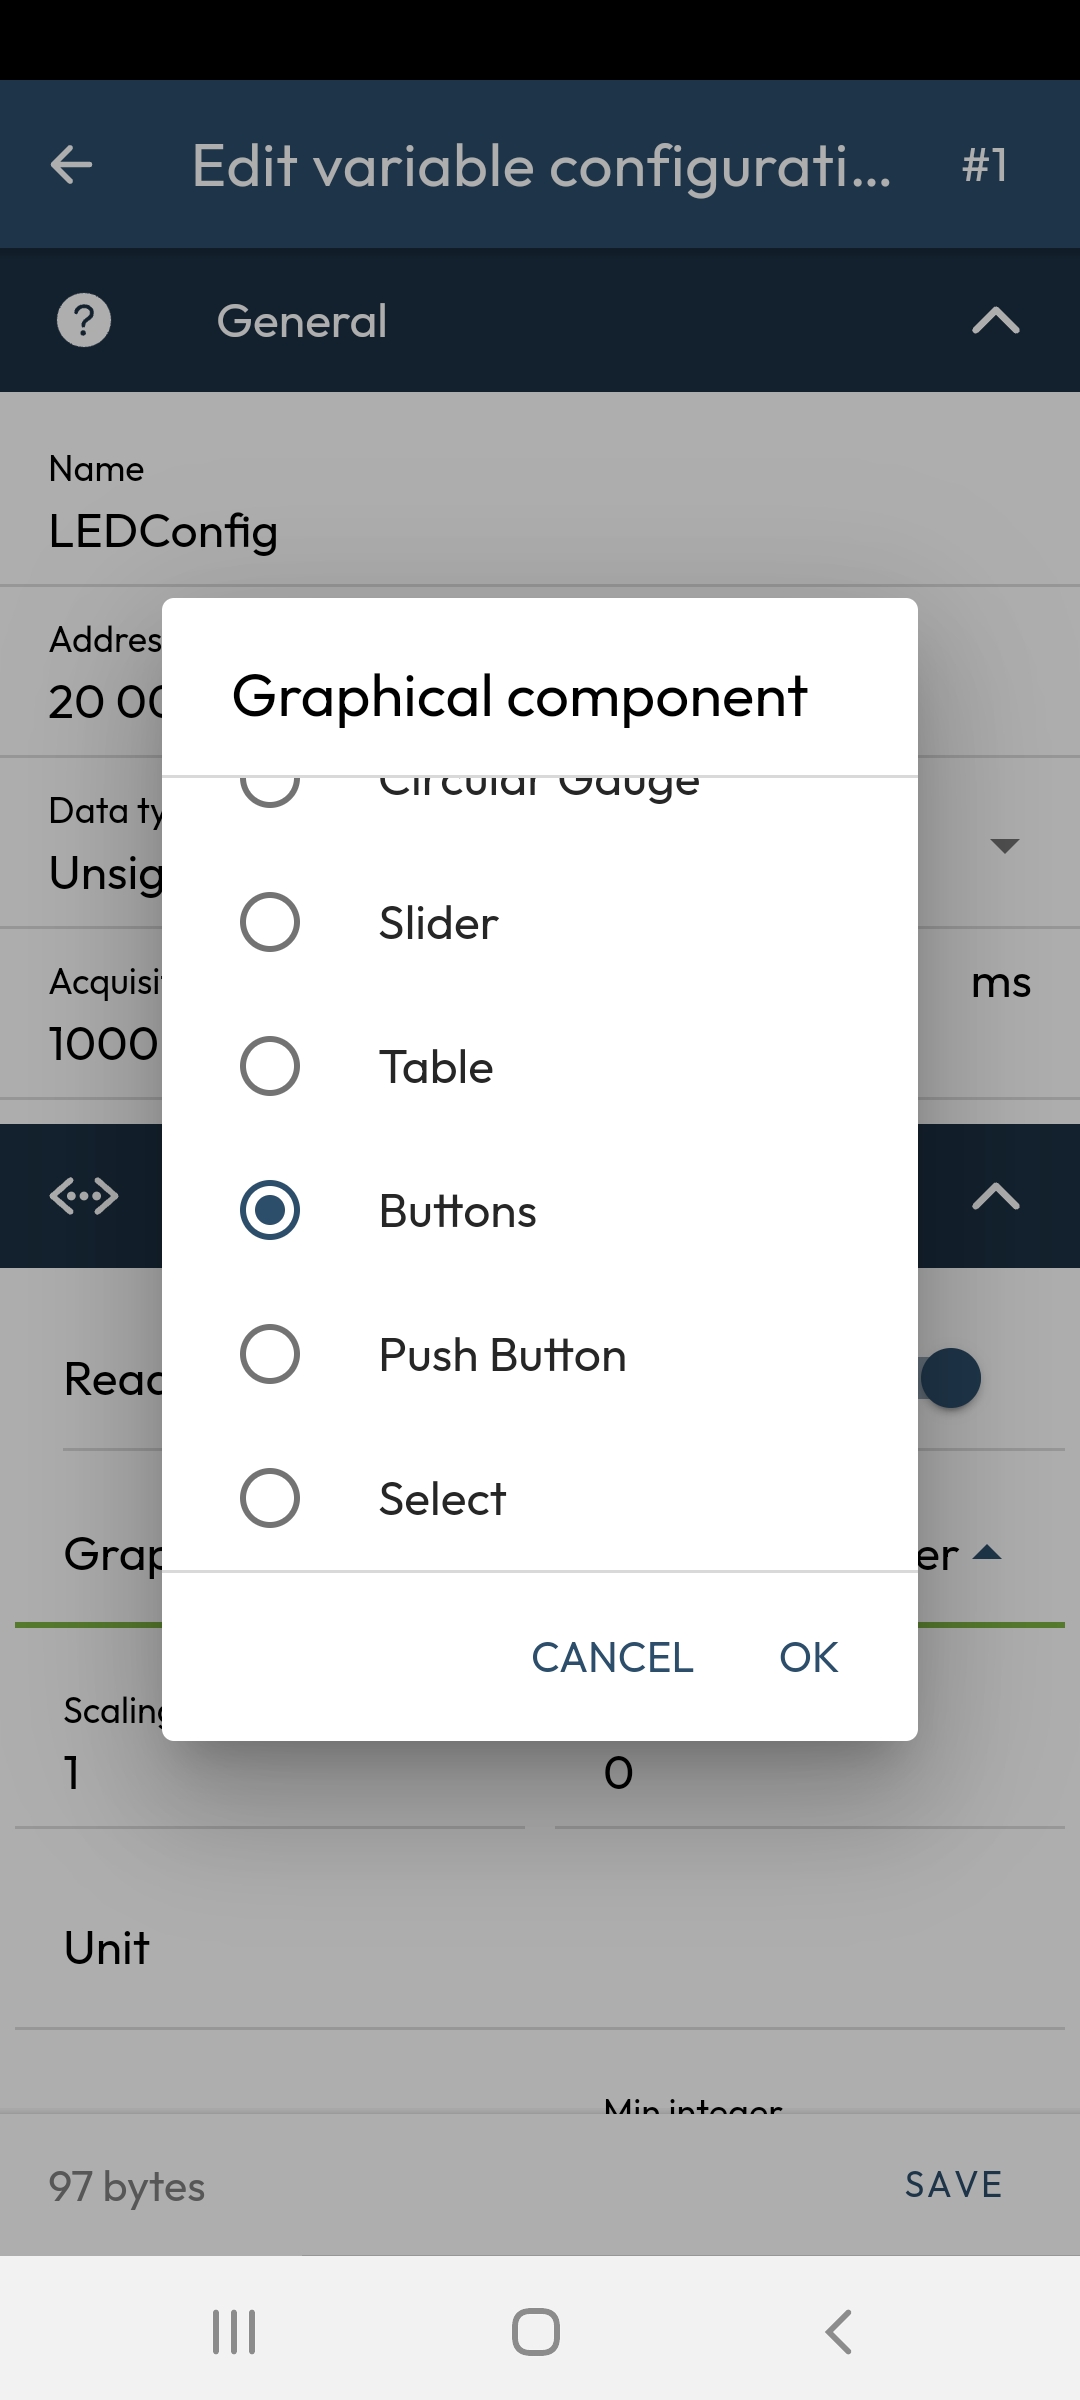
    - *OFF* and **0** for the first button,
    - *ON* and **1** for the second button
    - *BLINK* and **2** for the third button.
And let's rename LEDConfig to Mode.
Similarly, for the other variables:
- the variable 'Period' is associated with a 'Slider' to which we give 1 as minimum value and 250 as maximum value.
- The variable Temperature_C (renamed to Temperature ) is associated with a 'Linear Gauge' to which we give 0 as minimum value and 50 as maximum value (and °C as 'unit')
- The Voltage_V variable becomes 'Voltage' represented by a 'Circular Gauge', mini value=0, maxi value=5 and unit= 'V'.
Note that by default all the variables are both 'readable and writeable'. In the case of the Sensors variables (Temperature and Voltage), it makes sense to specify them as 'Read Only'.
We have finished our configuration! You can go back to 'Monitoring and play with the final application:
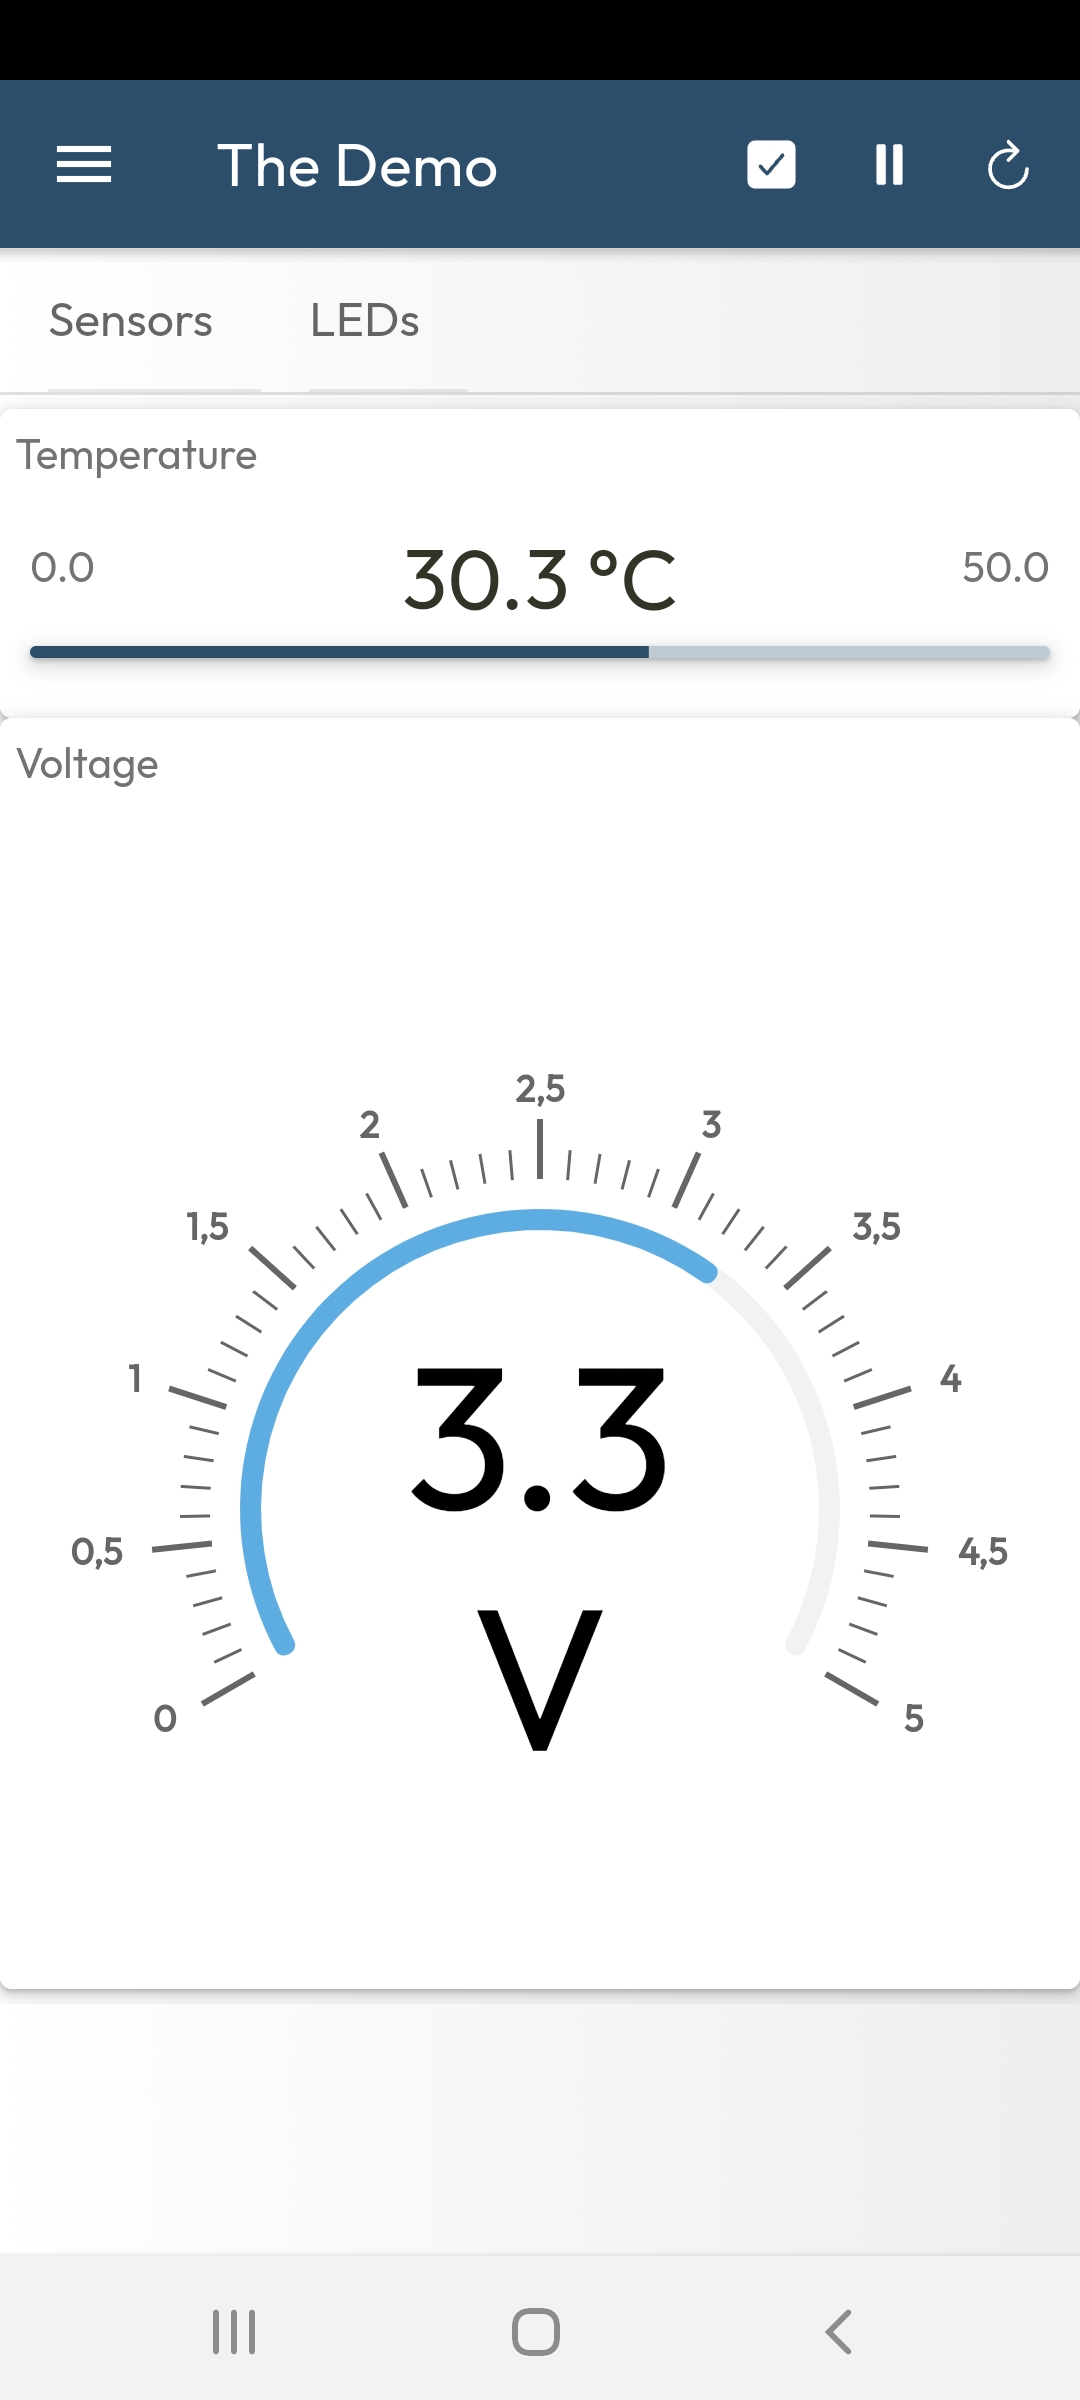
From now on, each time the phone is brought closer to the module, these 'Monitoring' pages will be automatically displayed.
'NFC only' mode
If your final application is intended to communicate only in NFC (without BLE or WiFi ), you can test this mode even with a Primer kit that supports BLE and/or WiFi . To do this, simply disable the BLE and/or WiFi channels :

- Connect to your module and log in as admin/admin
- In the 'burger' menu, open the 'Wireless Connectivity' page, go to configuration mode (button in the yellow banner),
- Switch BLE and WiFi channels to OFF .
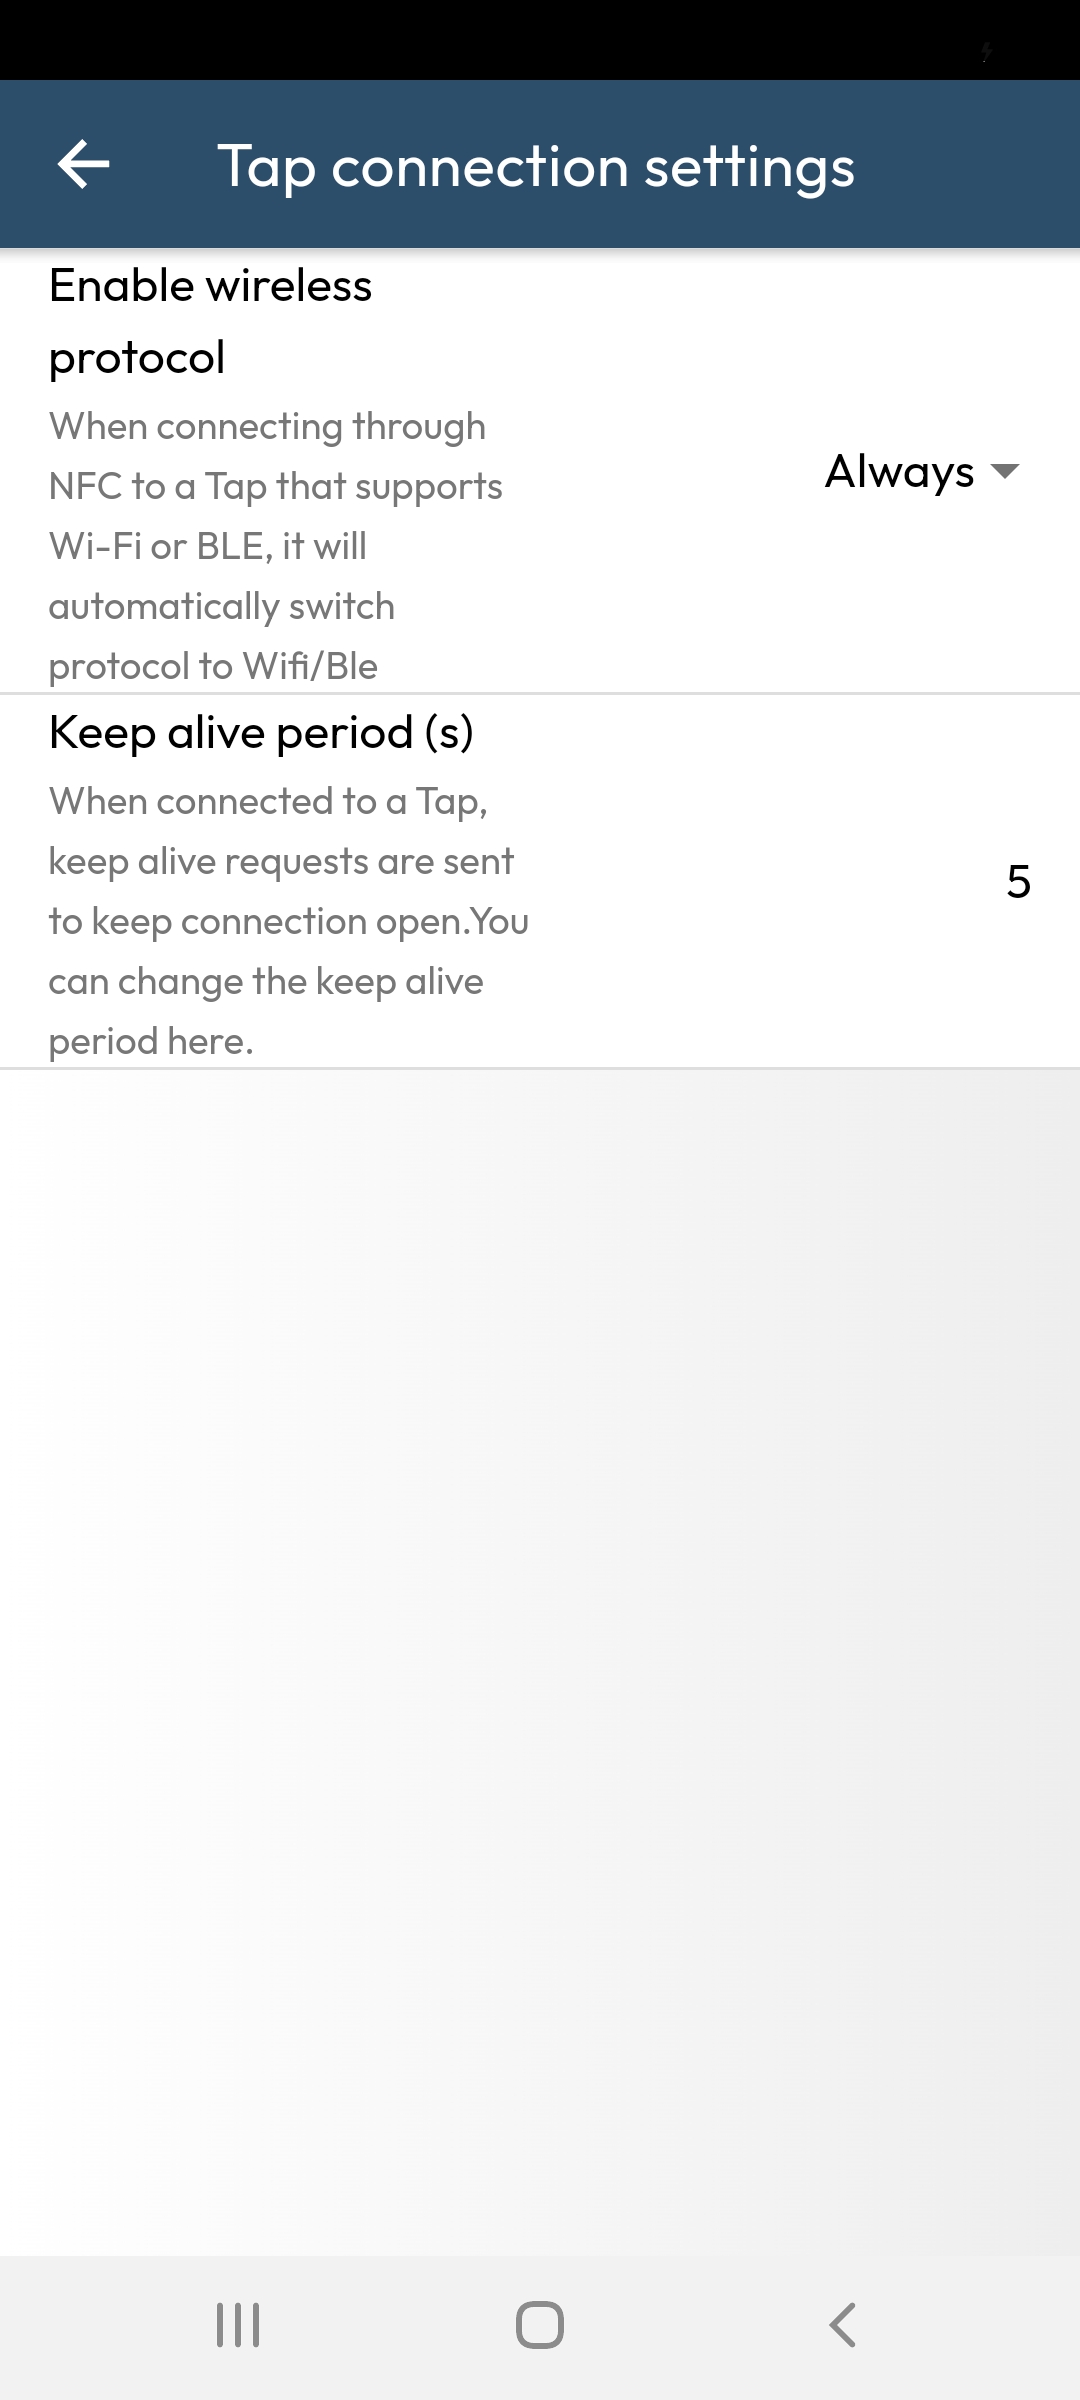
- Log out, then open the Login page. Click on the 'settings' button (a gear) in the upper right corner and disable 'Switch from NFC to BLE/WiFi'.
Remote Connection and Relay Mode
If your module features WiFi, you can use this channel for a remote connection. Otherwise, the 'remote' mode would remain possible (even for NFC) if the application is used in 'Relay' on the mobile of a third party. We will quickly test these two modes:
Connection via a Mobile in Relay Mode
The relay mode makes it possible to create a bridge between a remote user and the Tap. To do this, open the Relay page at the bottom of the burger menu.
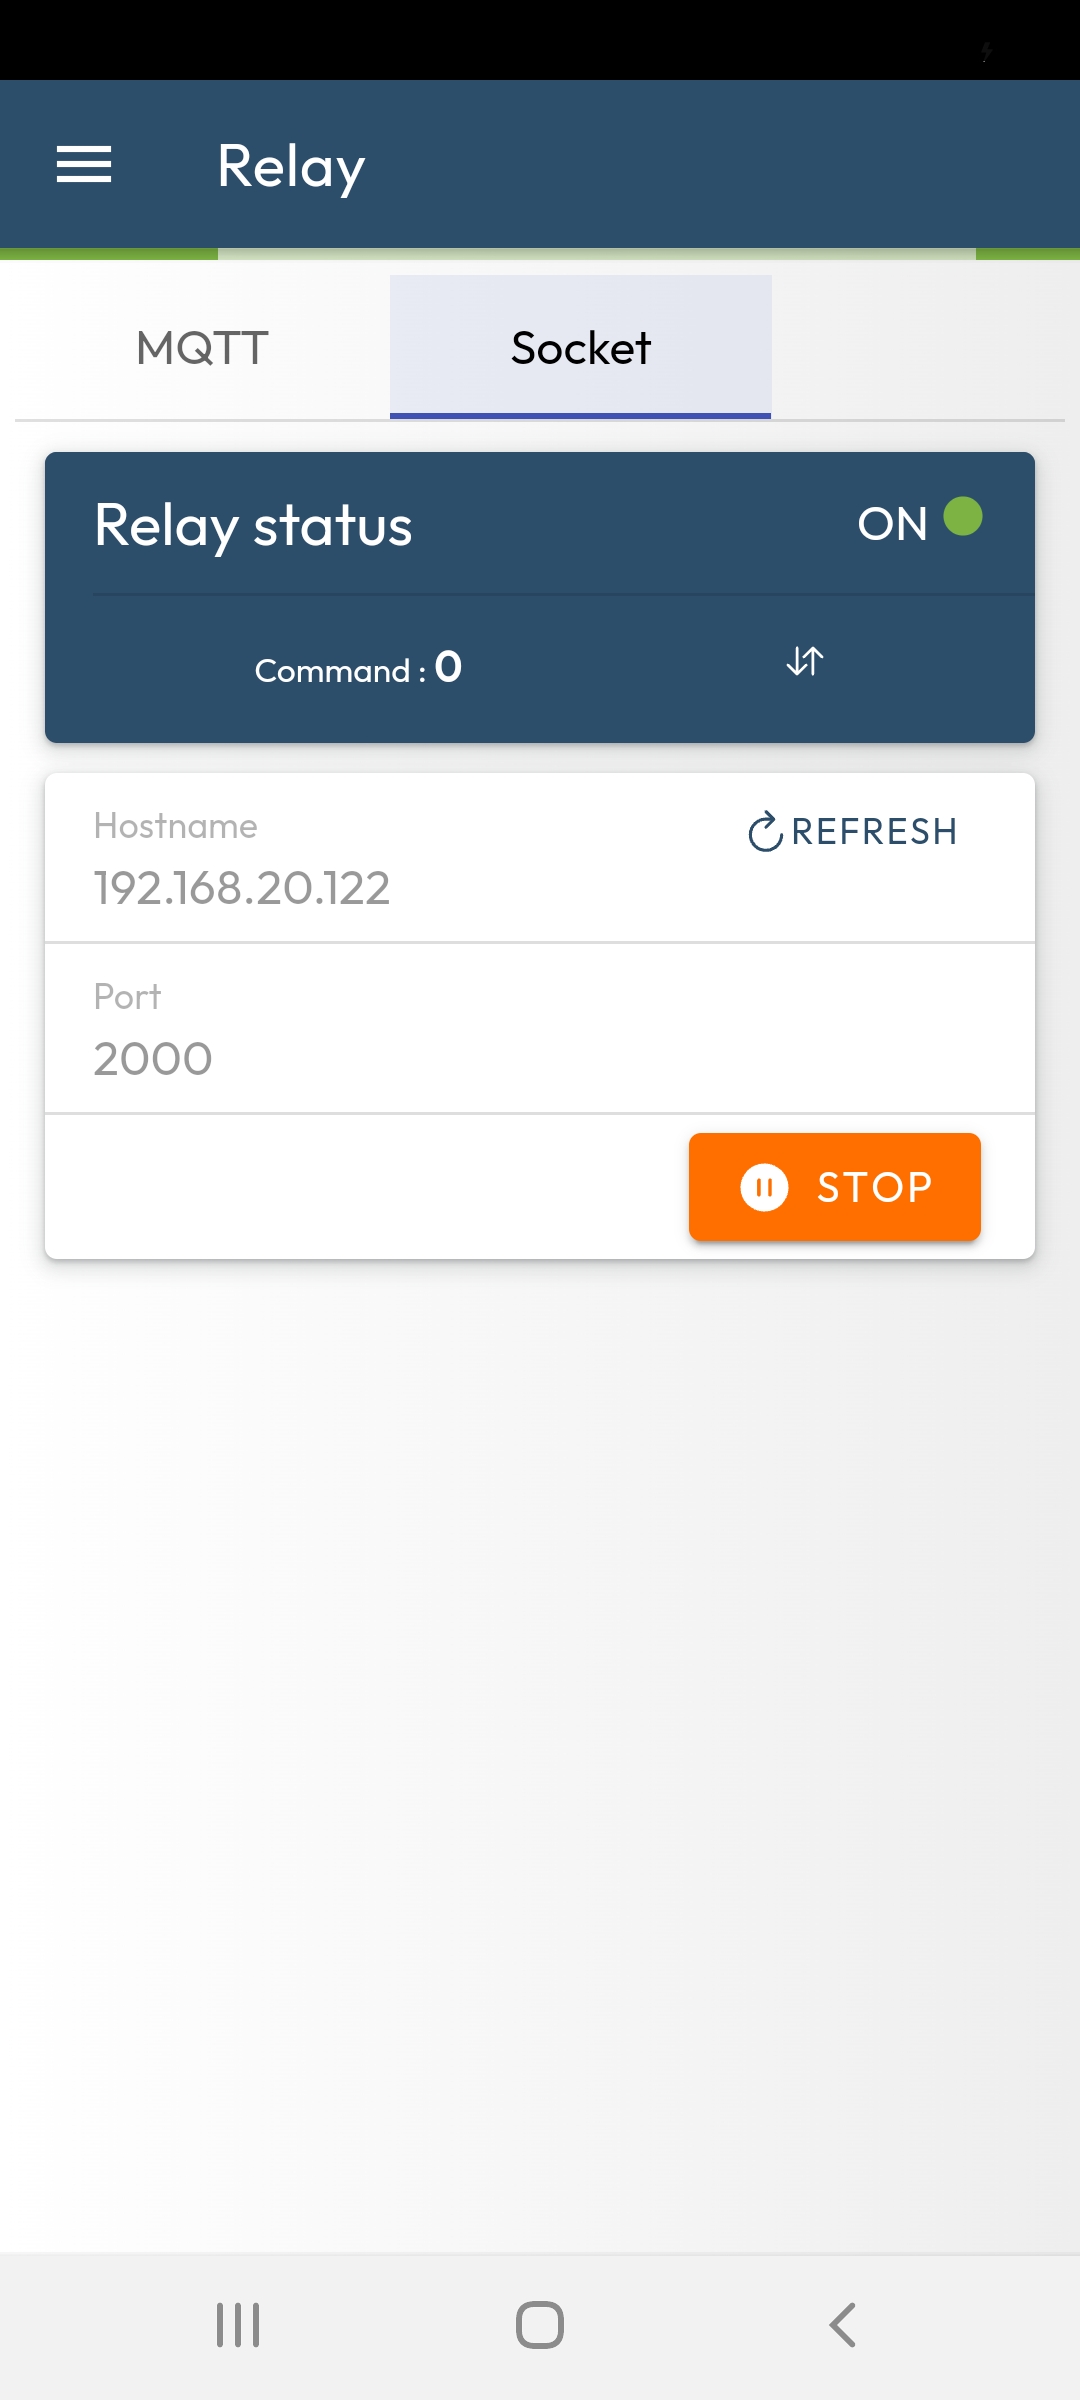
You can establish a socket relay that will be accessible on your local network (for example to link IoTize Studio on a PC to an NFC only Tap ), or an MQTT relay that will be accessible even from the Internet.
This relay mode via MQTT requires an MQTT broker. If you initially choose to use the TAPCloud broker (provided to developers by IoTize), the operation will be very simple:
- Select Use TapCloud MQTT Broker
- Click on Start,
- You can then share the link with a contact ('SH' button). If this person clicks on the link, the Tap Manager application will be opened on his browser and he will take remote control of the Tap. Note that if this remote user logs in with his own account, your phone will not be able to decrypt the communication, which will be secure from end to end (from Tap to the remote user). Your relay position does not give you access to decrypted data.
Note:
To use the TapCloud broker as a MQTT relay, you need to create an account. You can register or sign in from the Home page of the Tap Manager App. You also have to register your Tap (again with Tap Manager).